What's new in version 3.3.1
This page shows, step by step, how to use what arrived in version 3.3.1 of Signer. In each image, the place to click is marked in red. When there is more than one, the numbers give the order.
The full technical list, with the bug fixes, is in the changelog.
For those who sign and send documents
For those who manage an organization
- Restore deleted documents from the document list
- Restore canceled or expired documents
- Restore a document from its page
Paused tab and batch resume
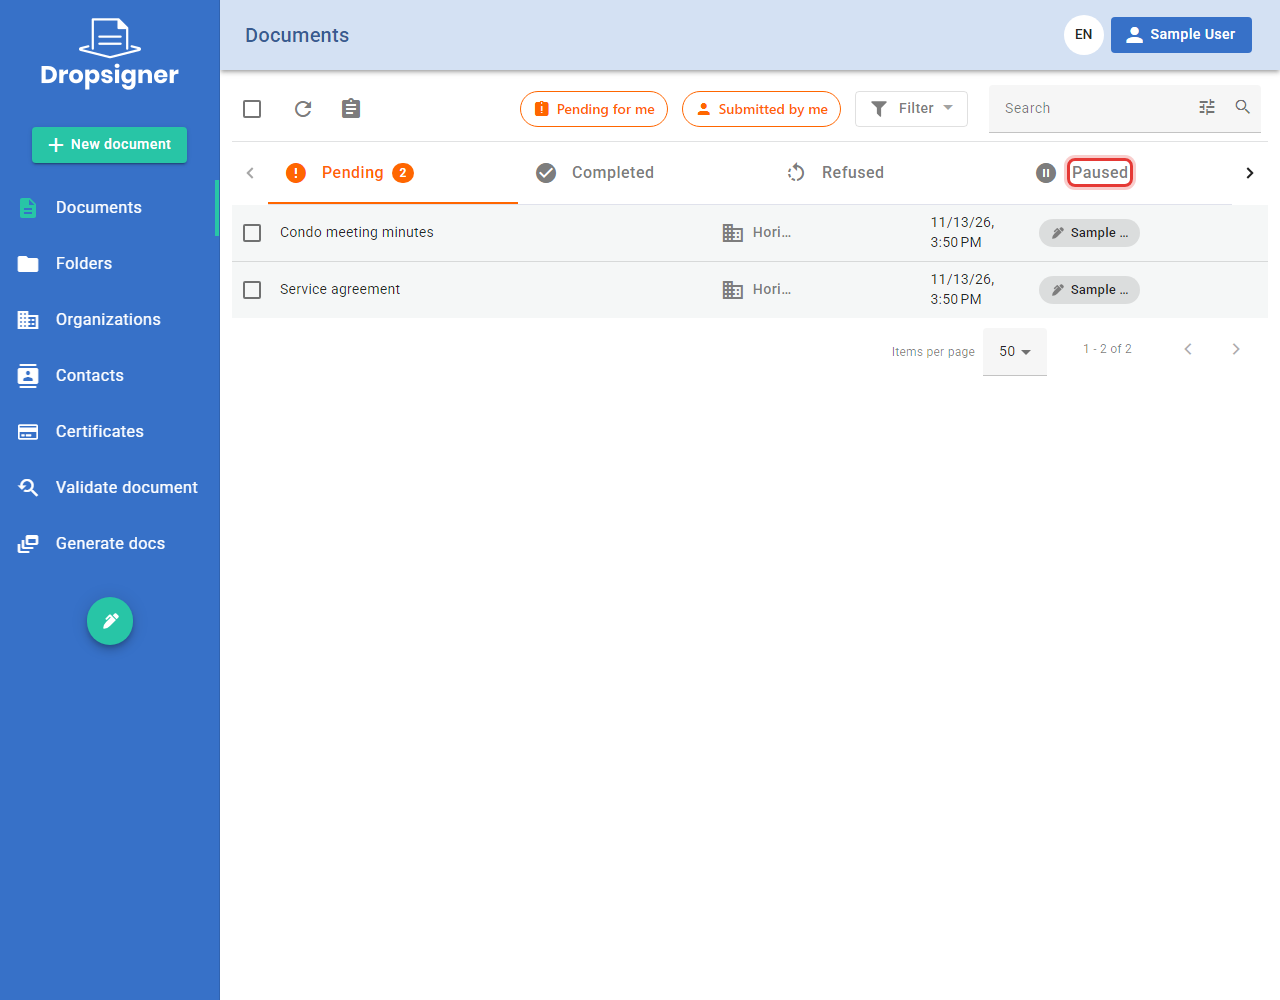
Paused documents now have a tab of their own in the document list and no longer show under Pending. In that tab, you resume one document or several at once.
-
In the left menu, click Documents and then the Paused tab.
-
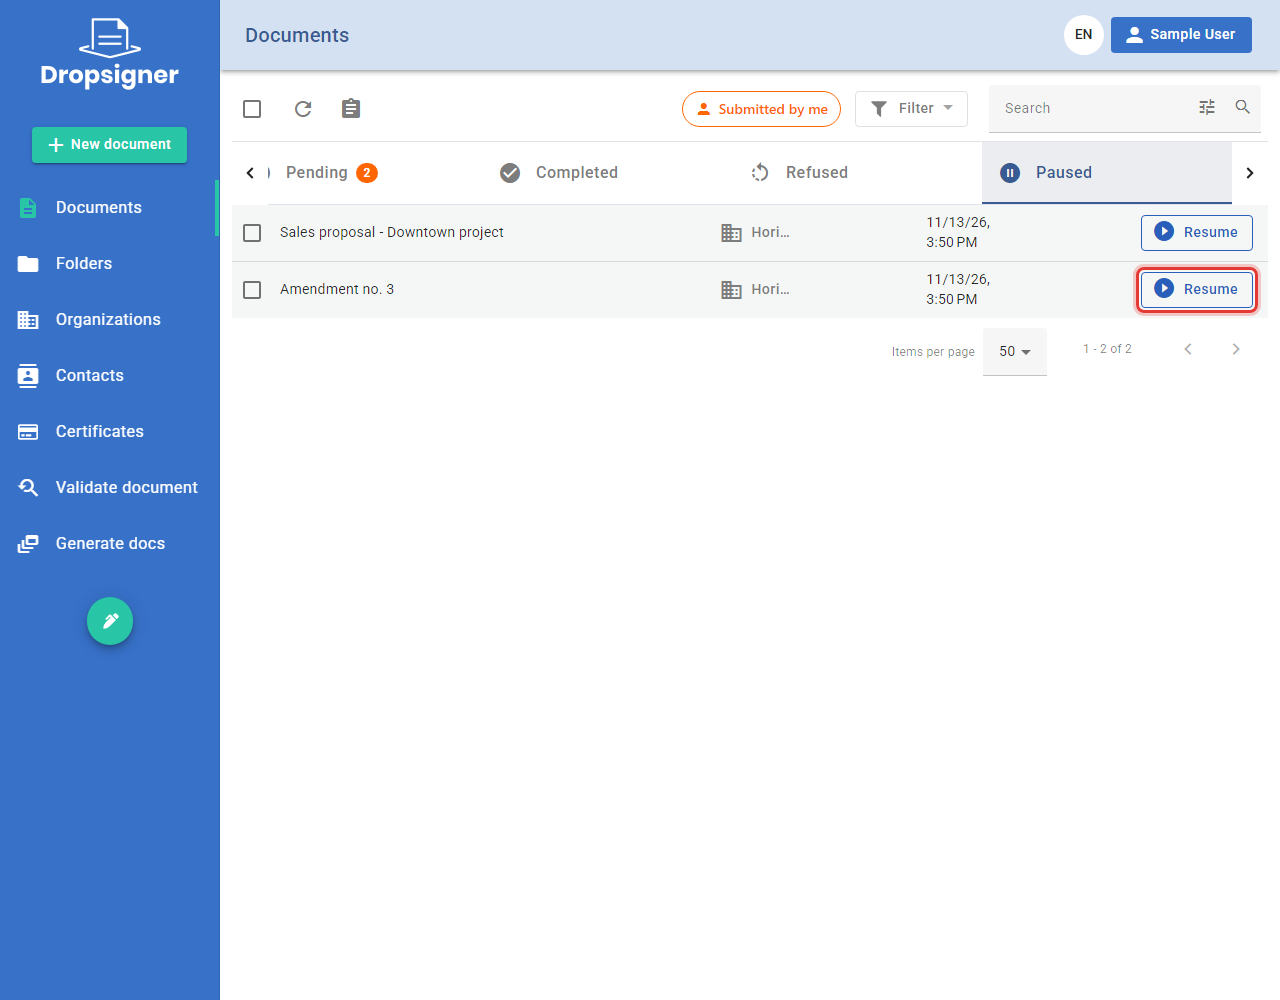
To resume a single document, click Resume on its row.
-
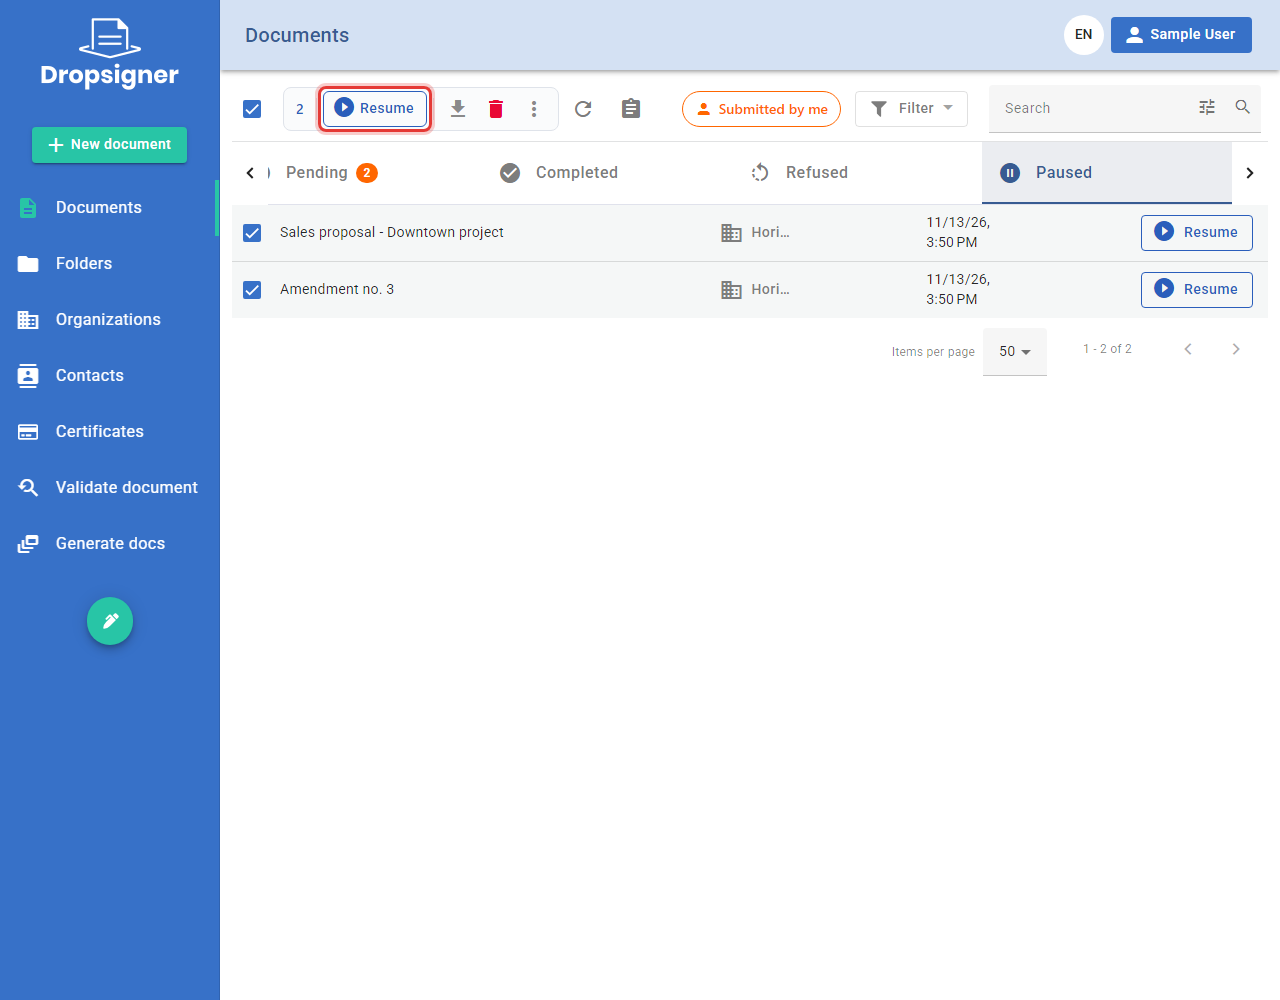
To resume several, select the documents and click Resume at the top of the list.
-
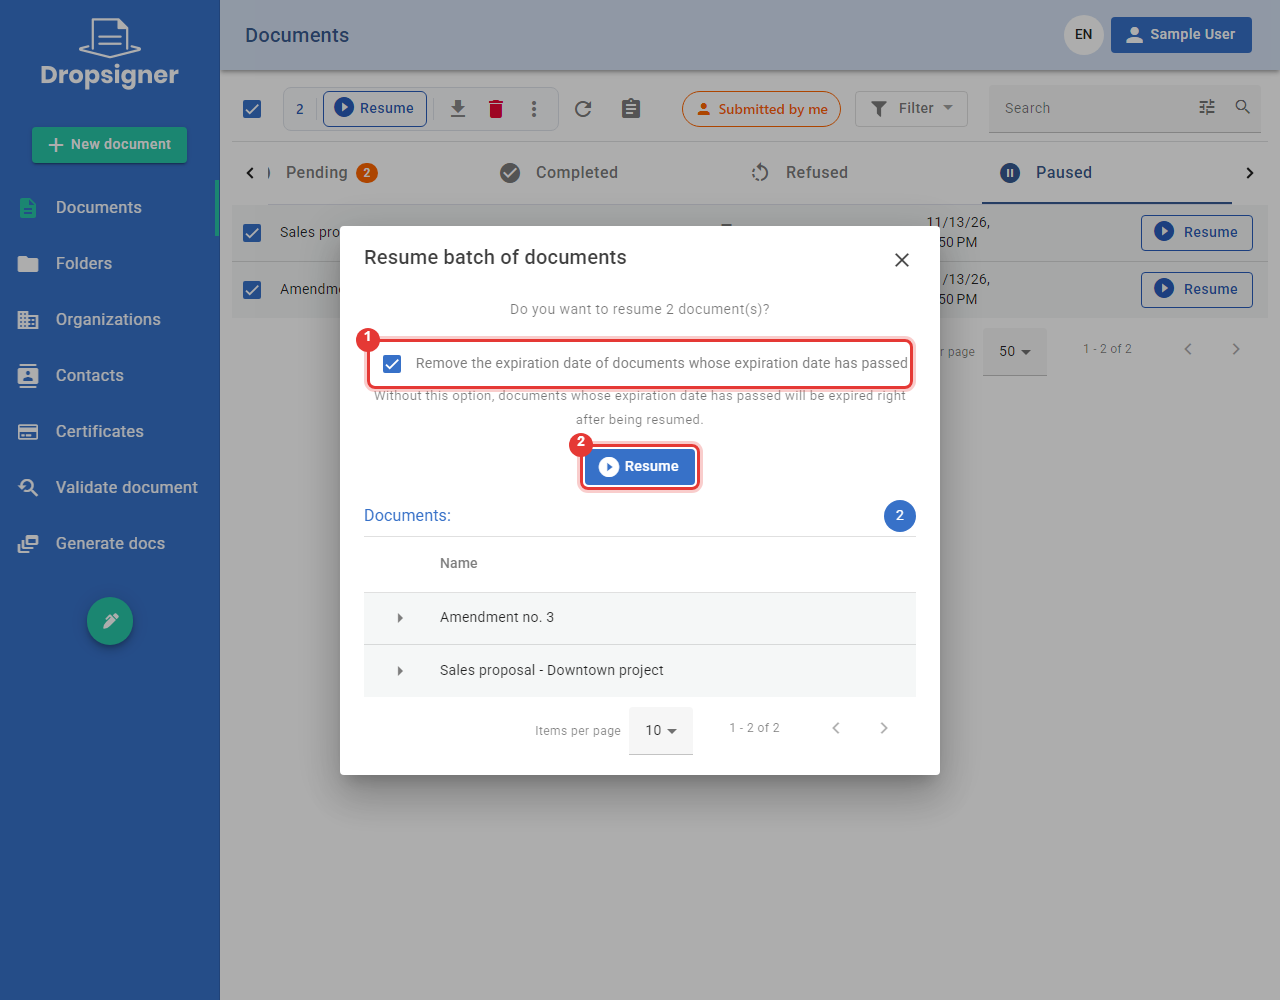
If a document passed its expiration date while it was paused, tick Remove the expiration date of documents whose expiration date has passed (1). Without this option, those documents expire right after being resumed. Click Resume (2).
-
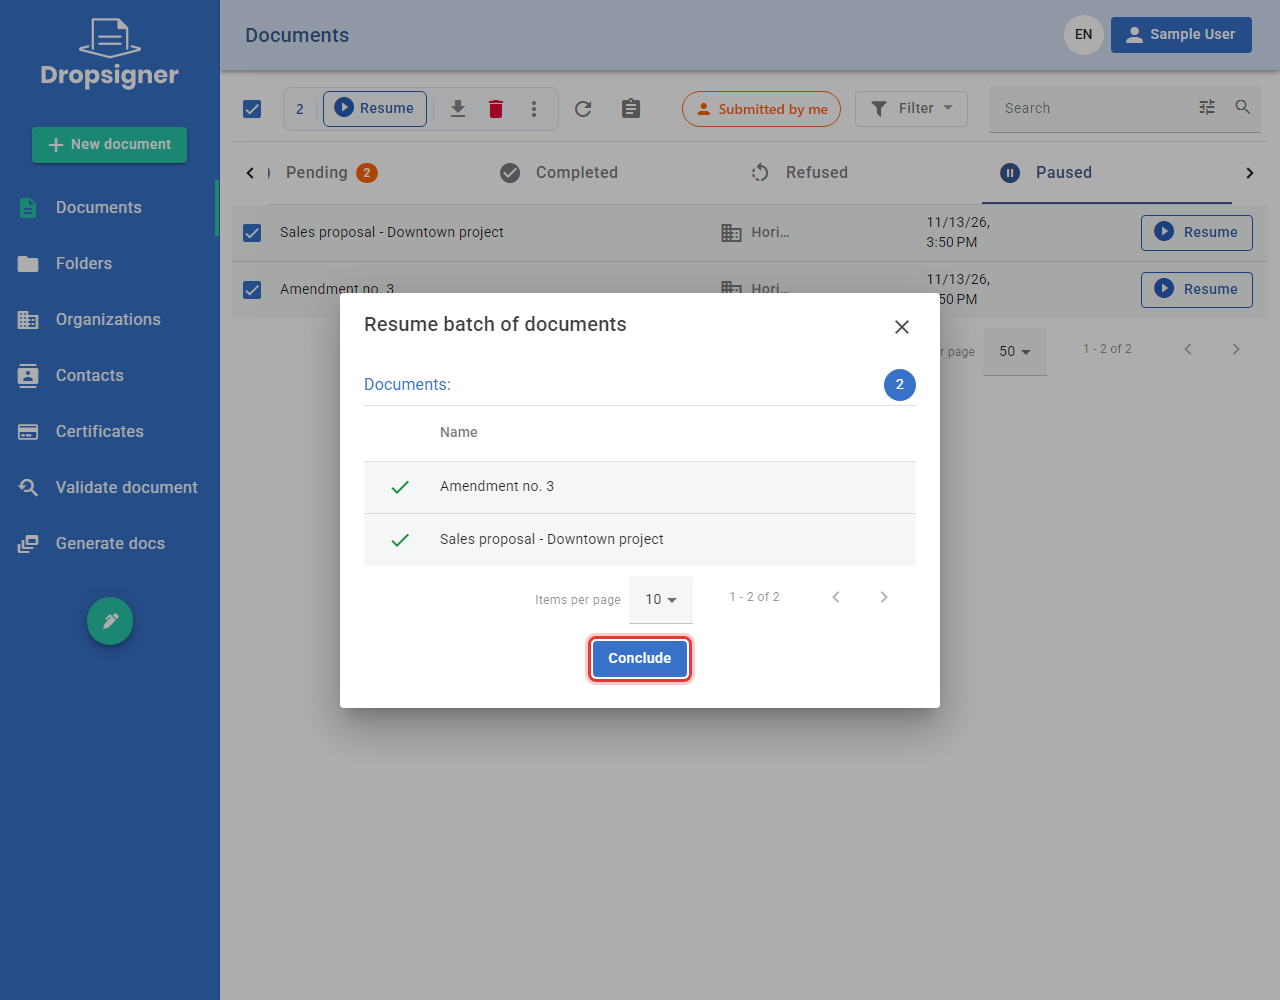
Each resumed document gets a green check and goes back to Pending. Click Conclude.
Learn more in Pausing and resuming documents.
Edit and resume a paused document
While a document is paused, nobody signs, approves or refuses it, and its flow cannot be changed. Now you can fix its information, such as the name and the expiration date, before resuming it.
-
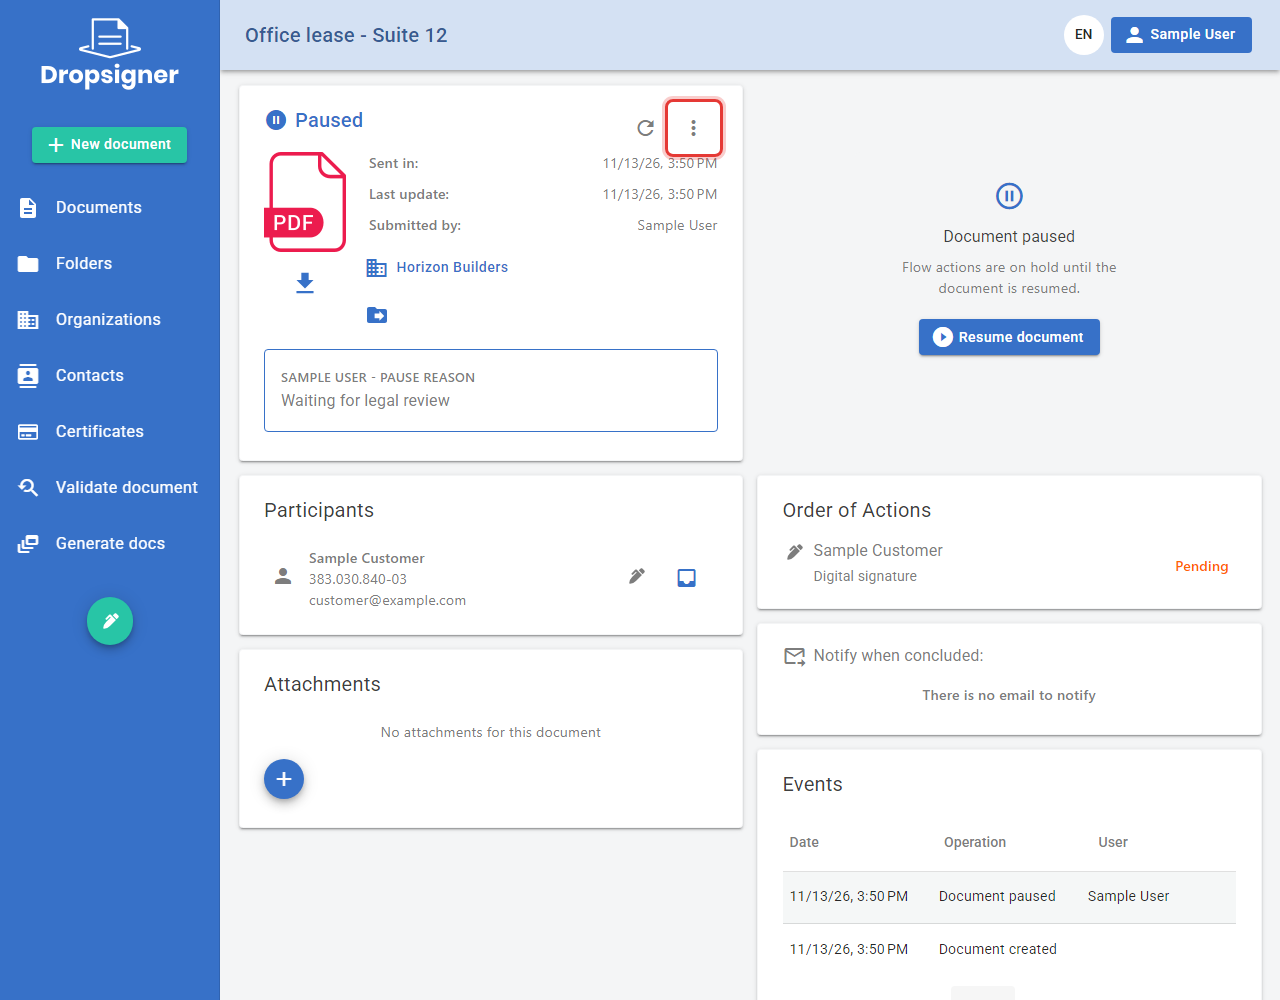
Open the paused document and click the more options button (⋮).
-
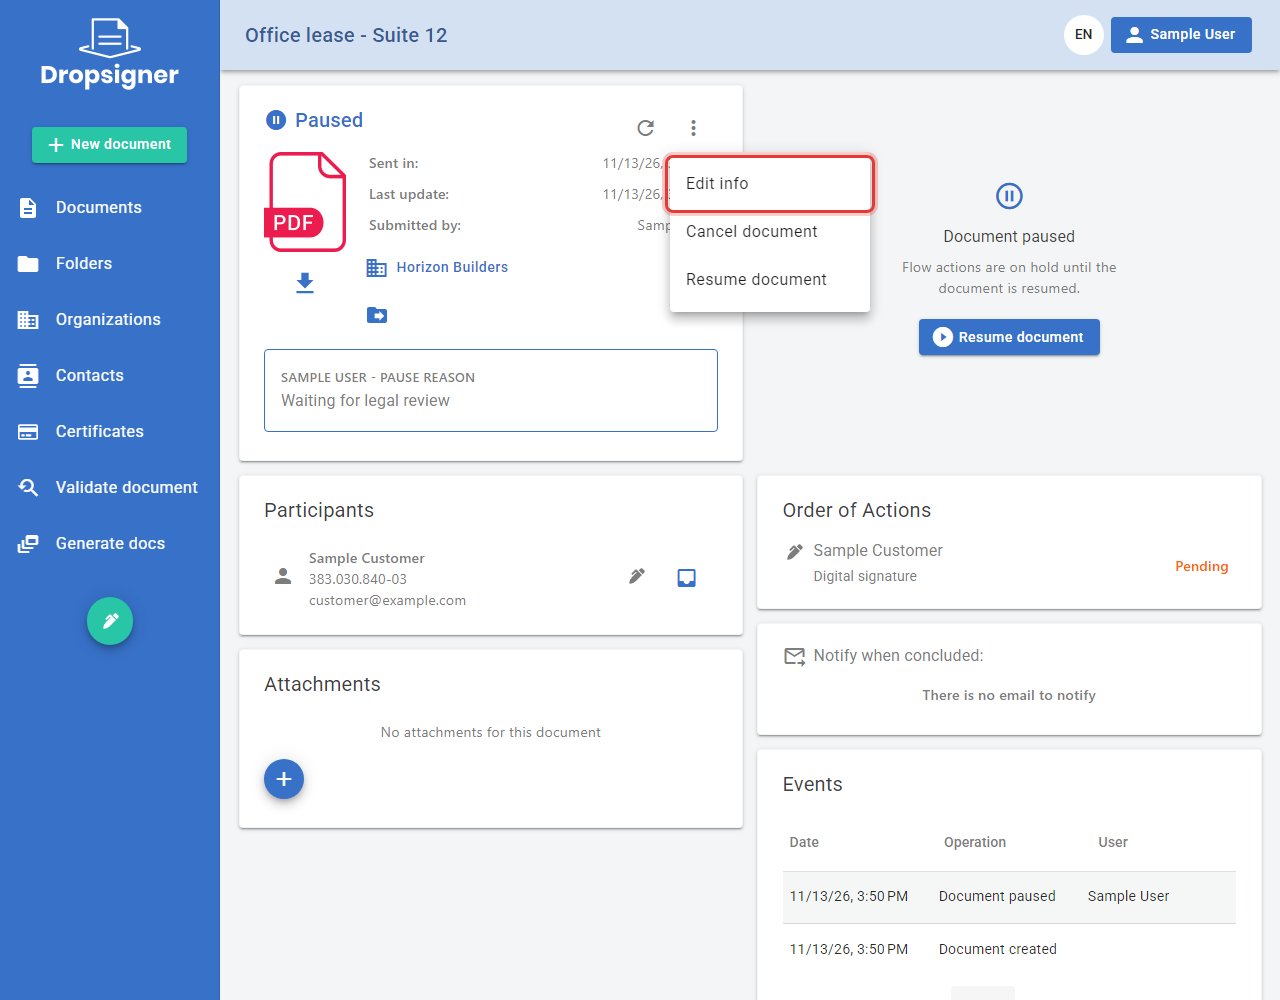
Click Edit info.
-
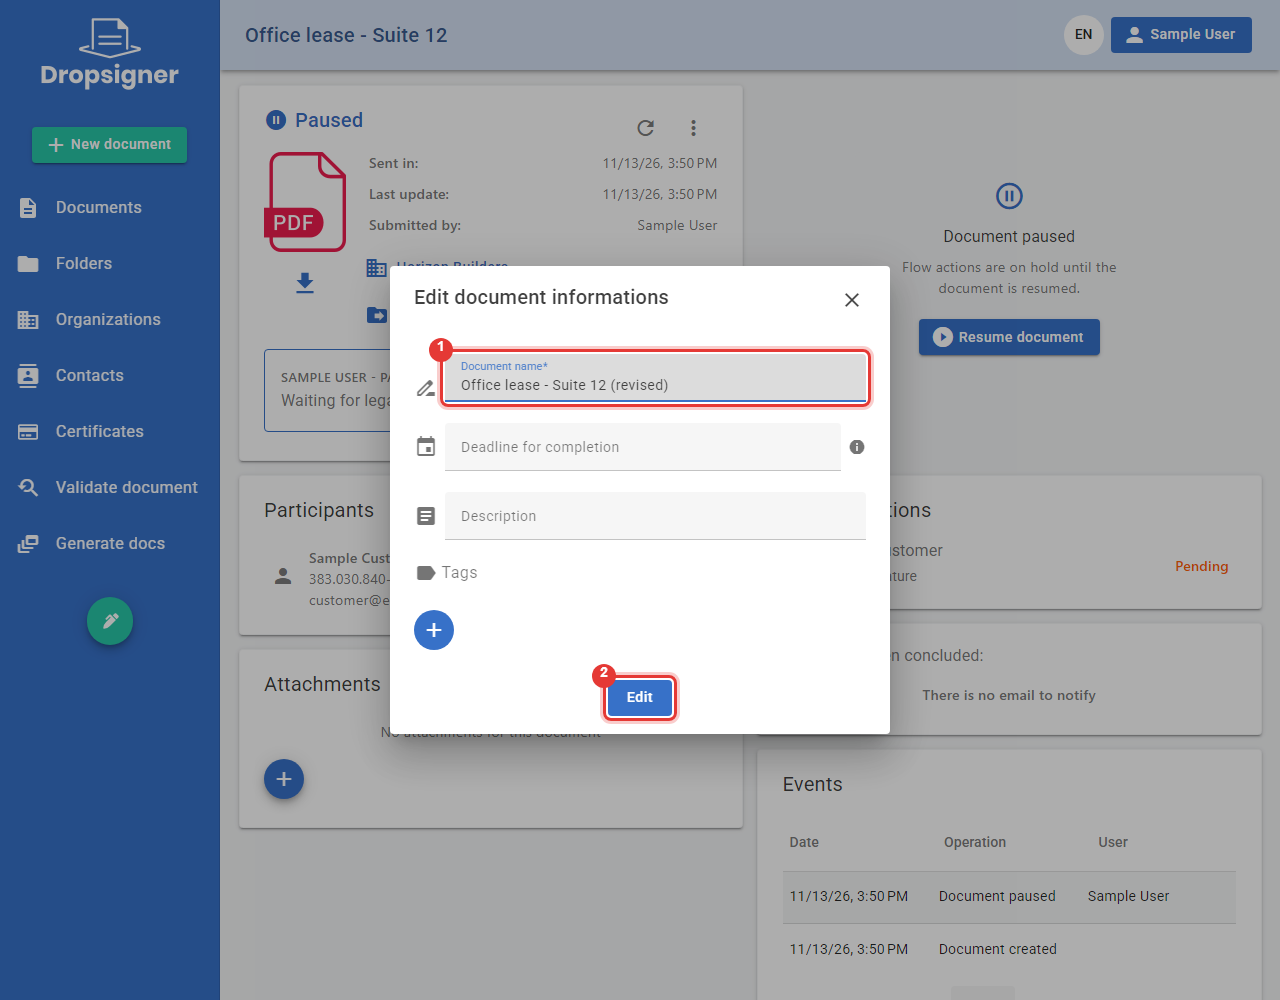
Change what you need, such as the Document name (1), the deadline, the description or the tags, and click Edit (2).
-
When it is ready, click Resume document.
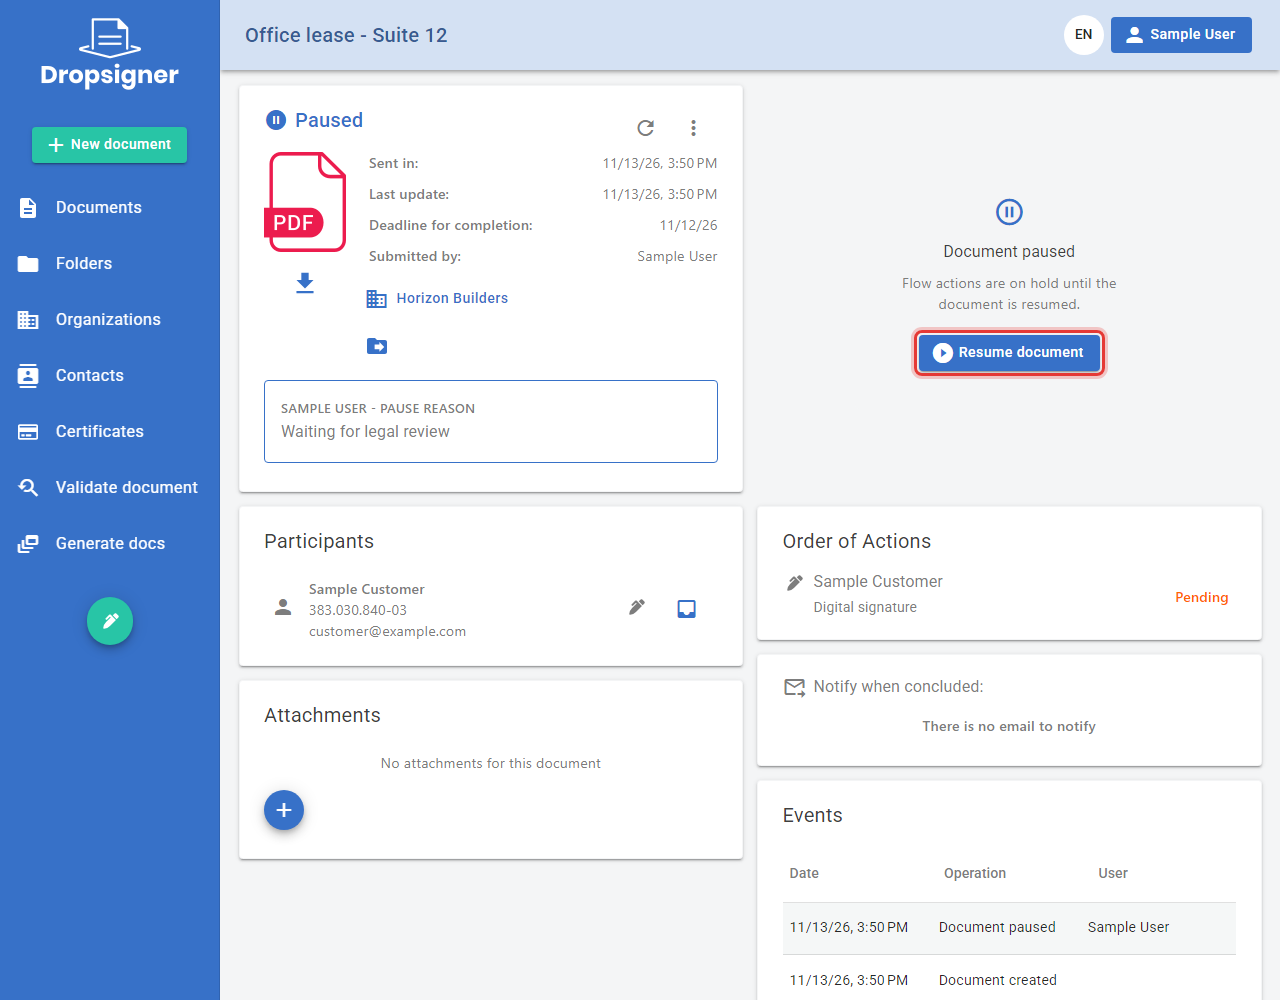
-
If the expiration date has already passed, Signer warns you and asks what to do. Click Remove expiration date and resume for the flow to go on. With Resume as expired, the document expires right away.
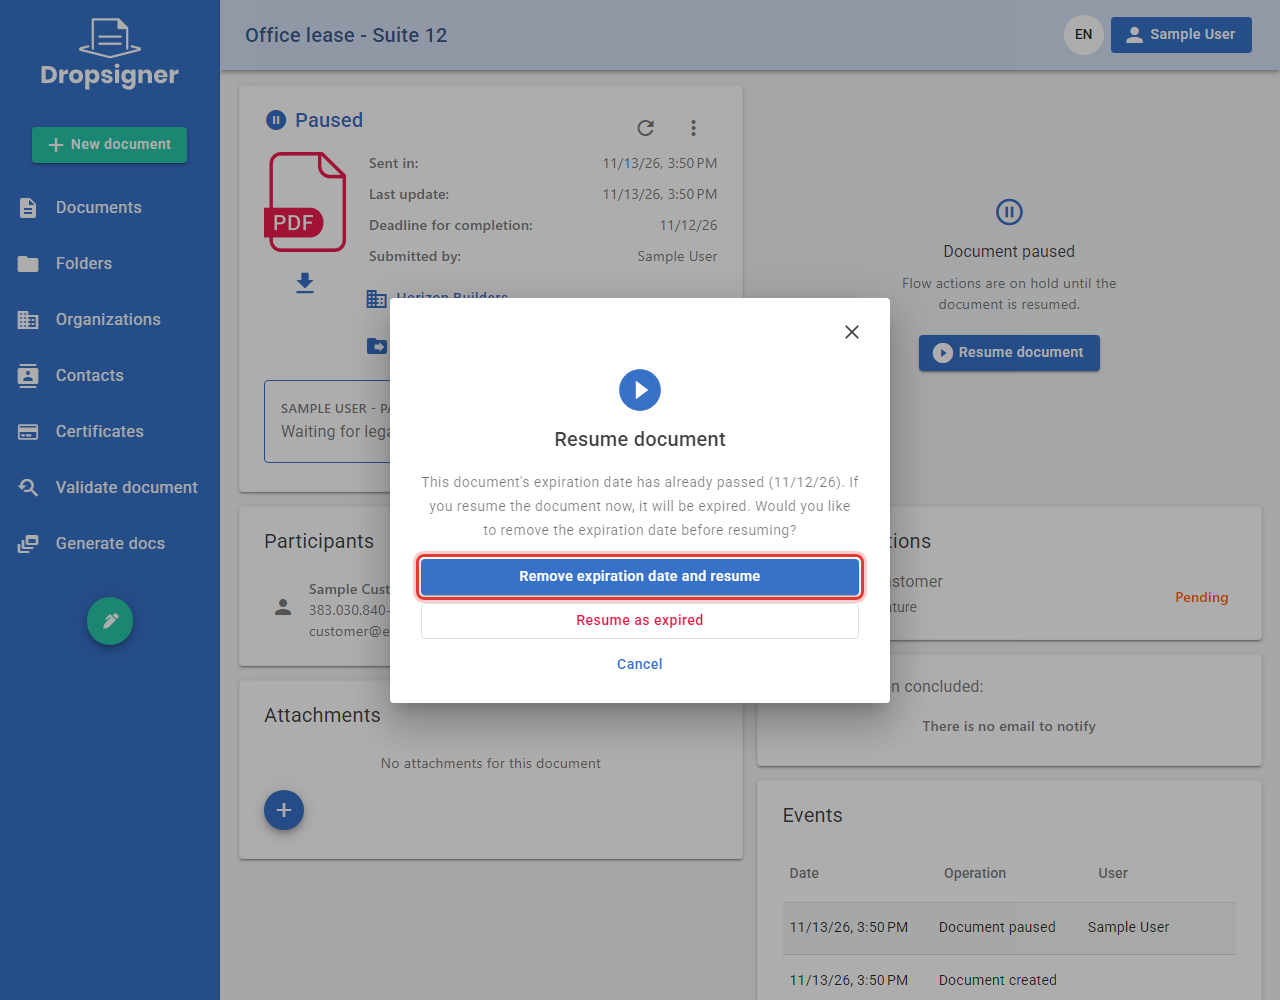
Document pausing is on by default. The General:EnableDocumentPause setting turns it off.
Learn more in Editing a paused document and Resuming a document.
Restore deleted documents from the document list
In version 3.3.0, organization administrators restored deleted documents from the organization page. Now this lives in the document list itself, in the Deleted tab.
-
In the left menu, click Documents and then the Deleted tab. If you cannot see it, use the arrow to the right of the tabs.
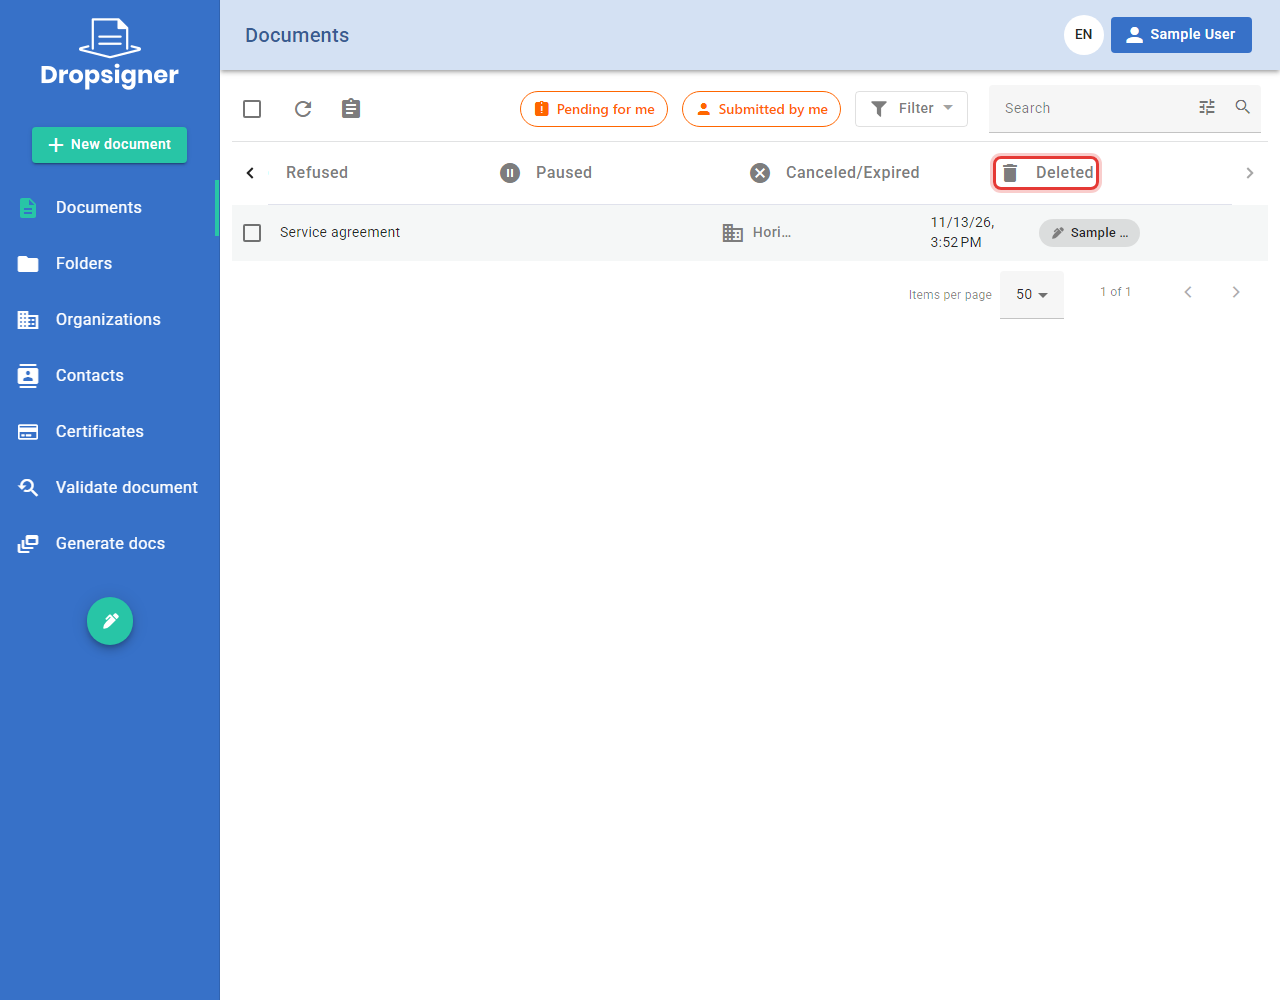
-
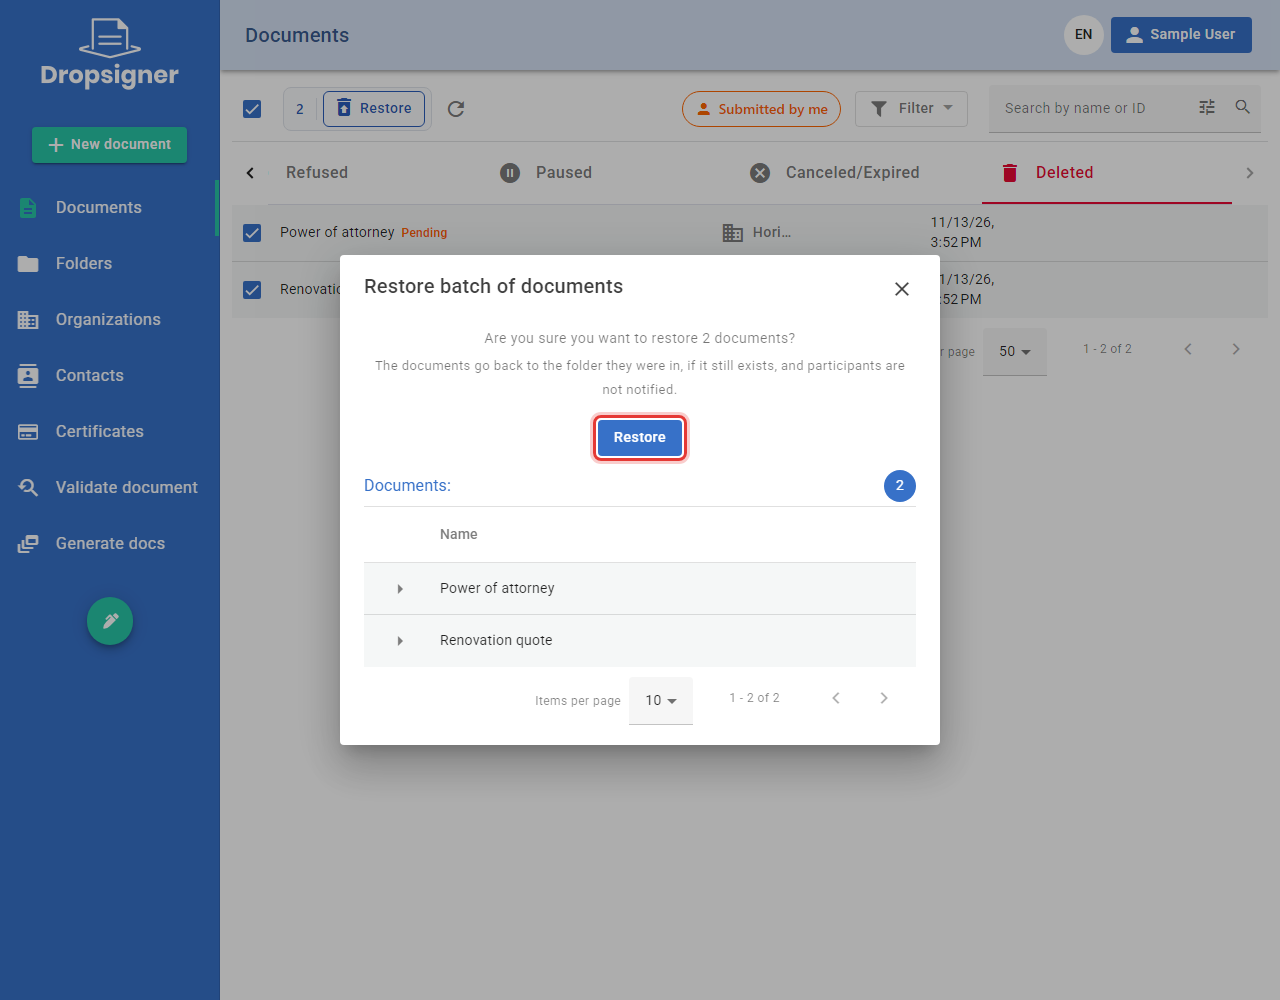
The tab shows the deleted documents of the organizations you manage, with the deletion date. Select the ones to restore and click Restore.
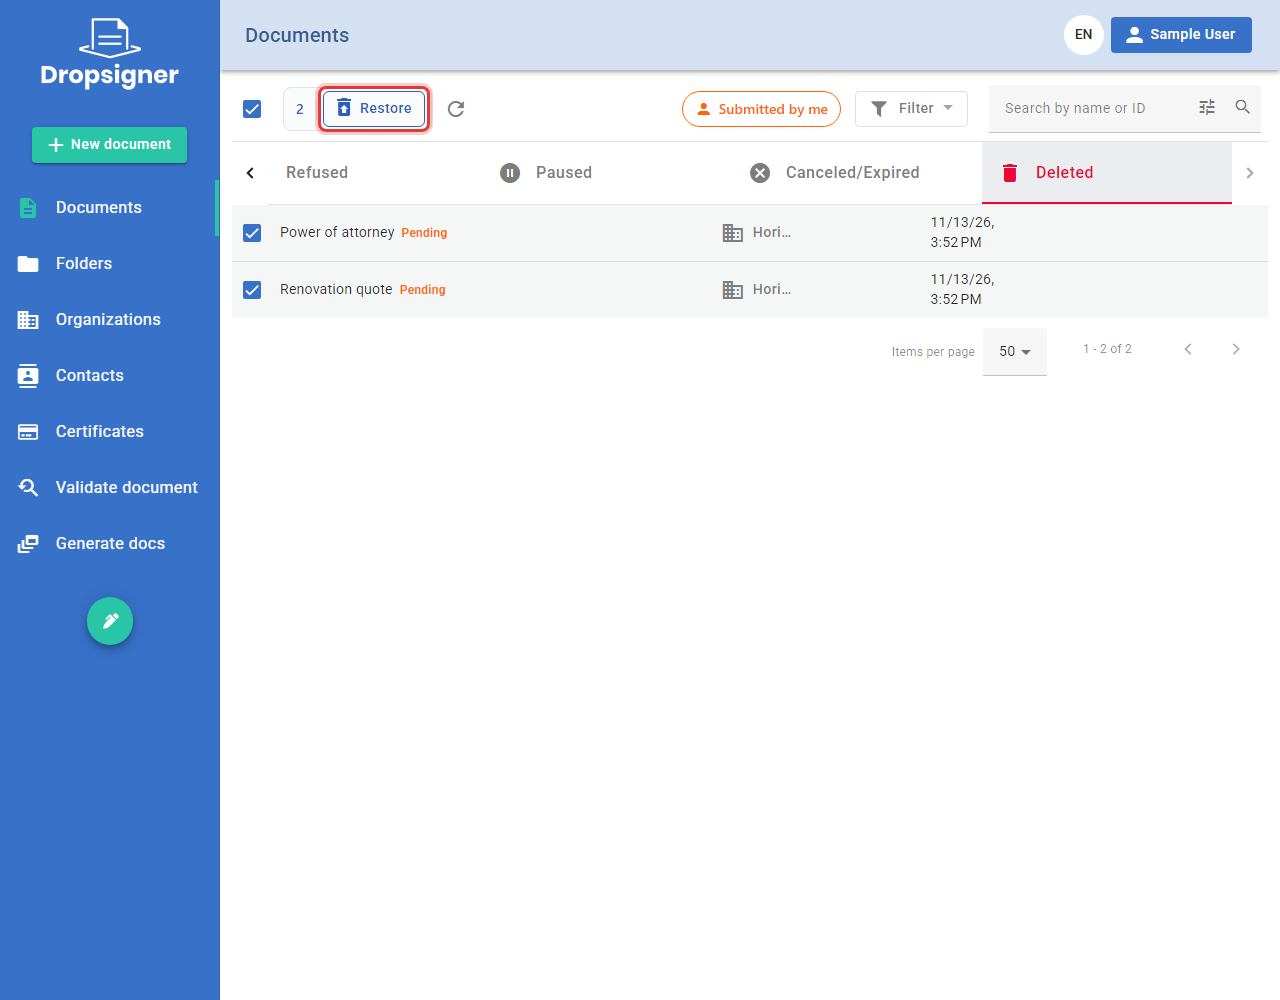
-
Check the number of documents and click Restore to confirm. The documents go back to the folder they were in, if it still exists, and participants are not notified.
-
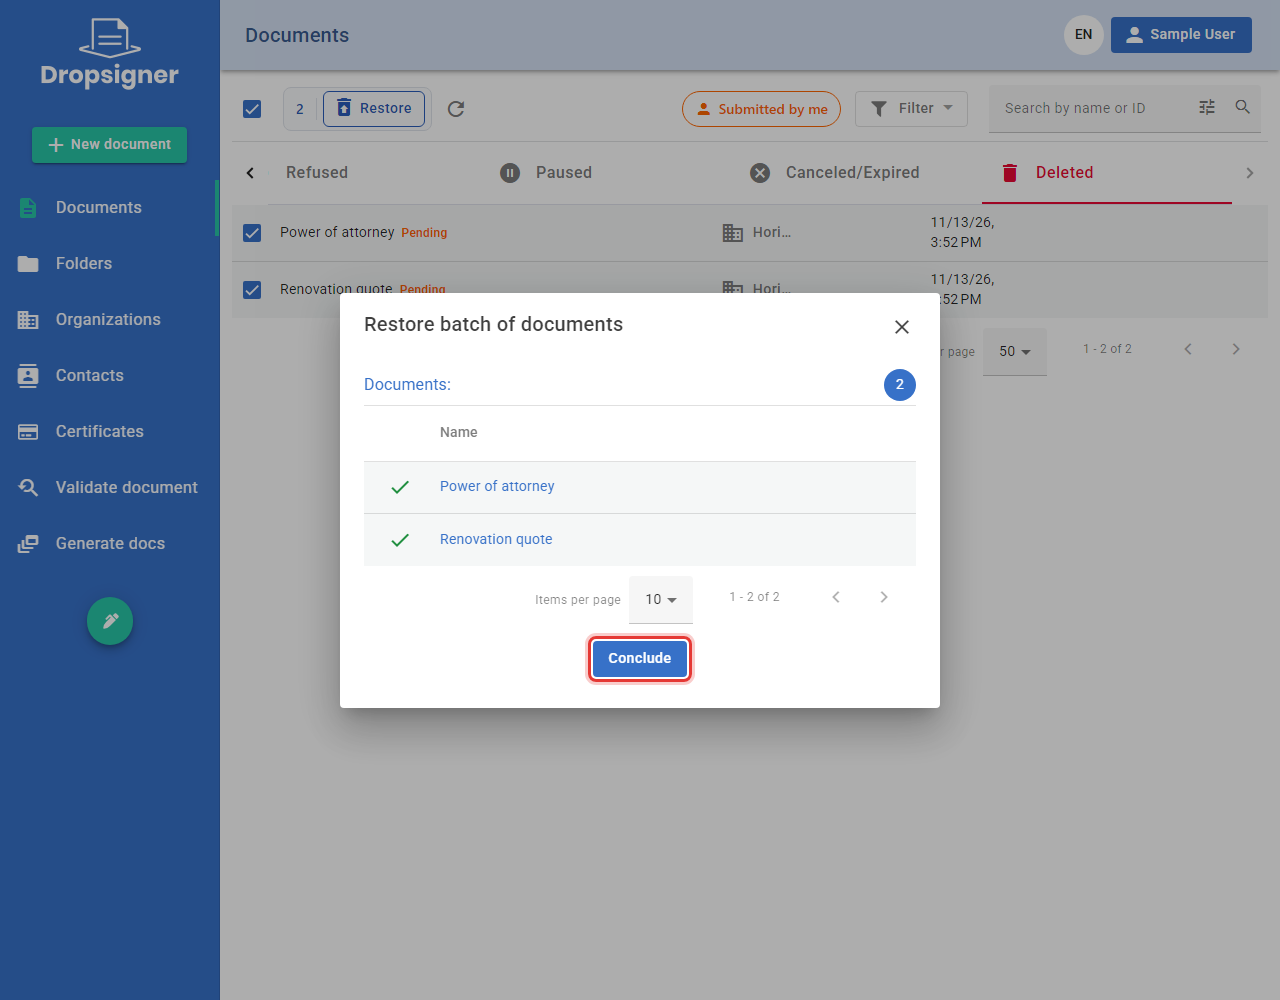
Each restored document gets a green check. You can close the window before it ends: the restoration goes on in the background. Click Conclude.
If the expiration date passed while the document was deleted, it comes back already expired. To release it, follow Restore canceled or expired documents.
Learn more in Deleted documents.
Restore canceled or expired documents
Organization administrators can now also bring canceled or expired documents back to the status they had before, so the signing flow goes on. In version 3.3.0, only the system administrator could do this.
-
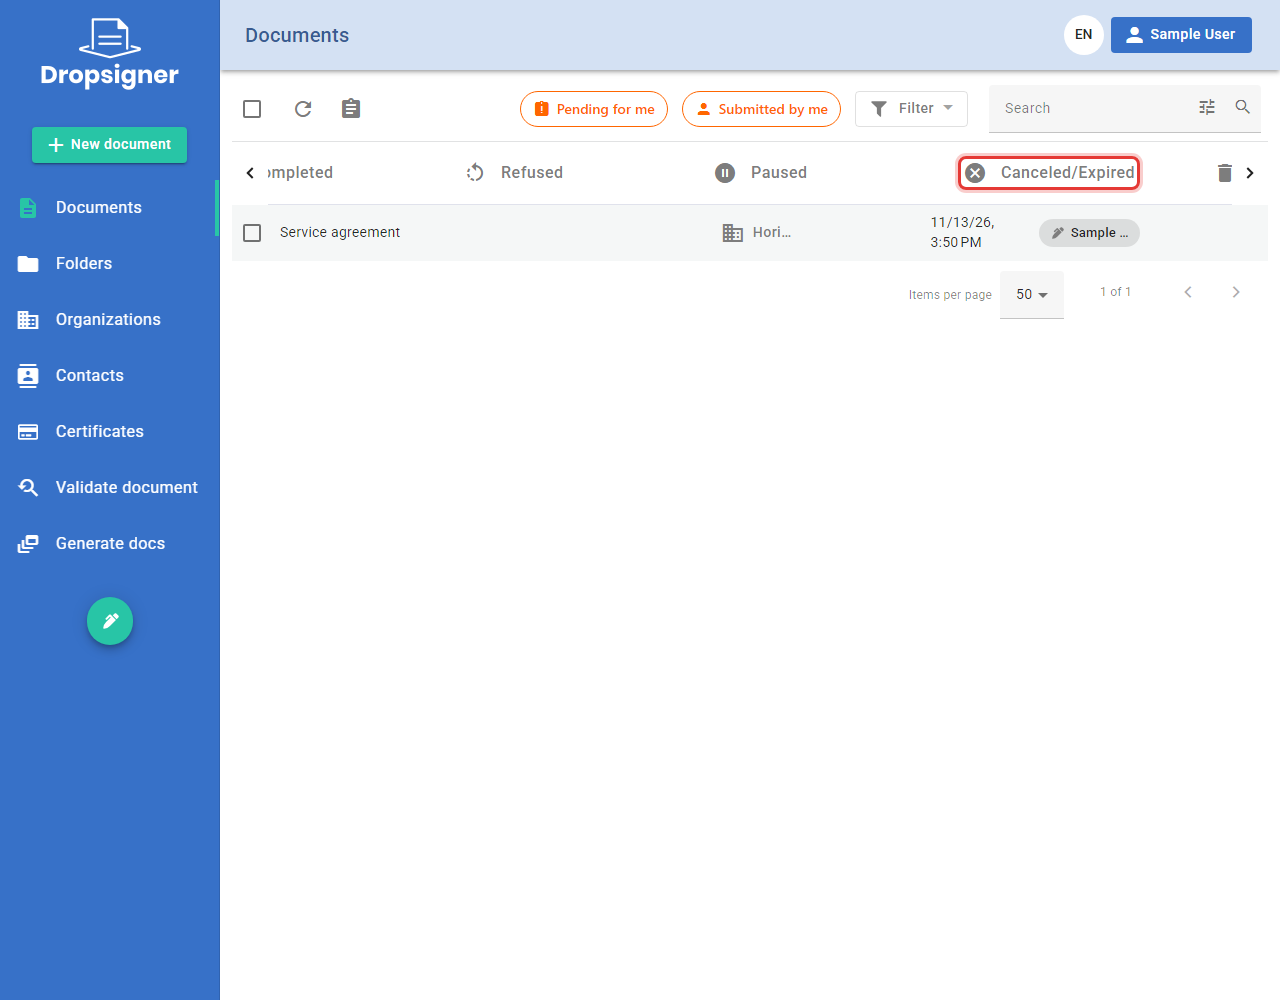
In the document list, click the Canceled/Expired tab.
-
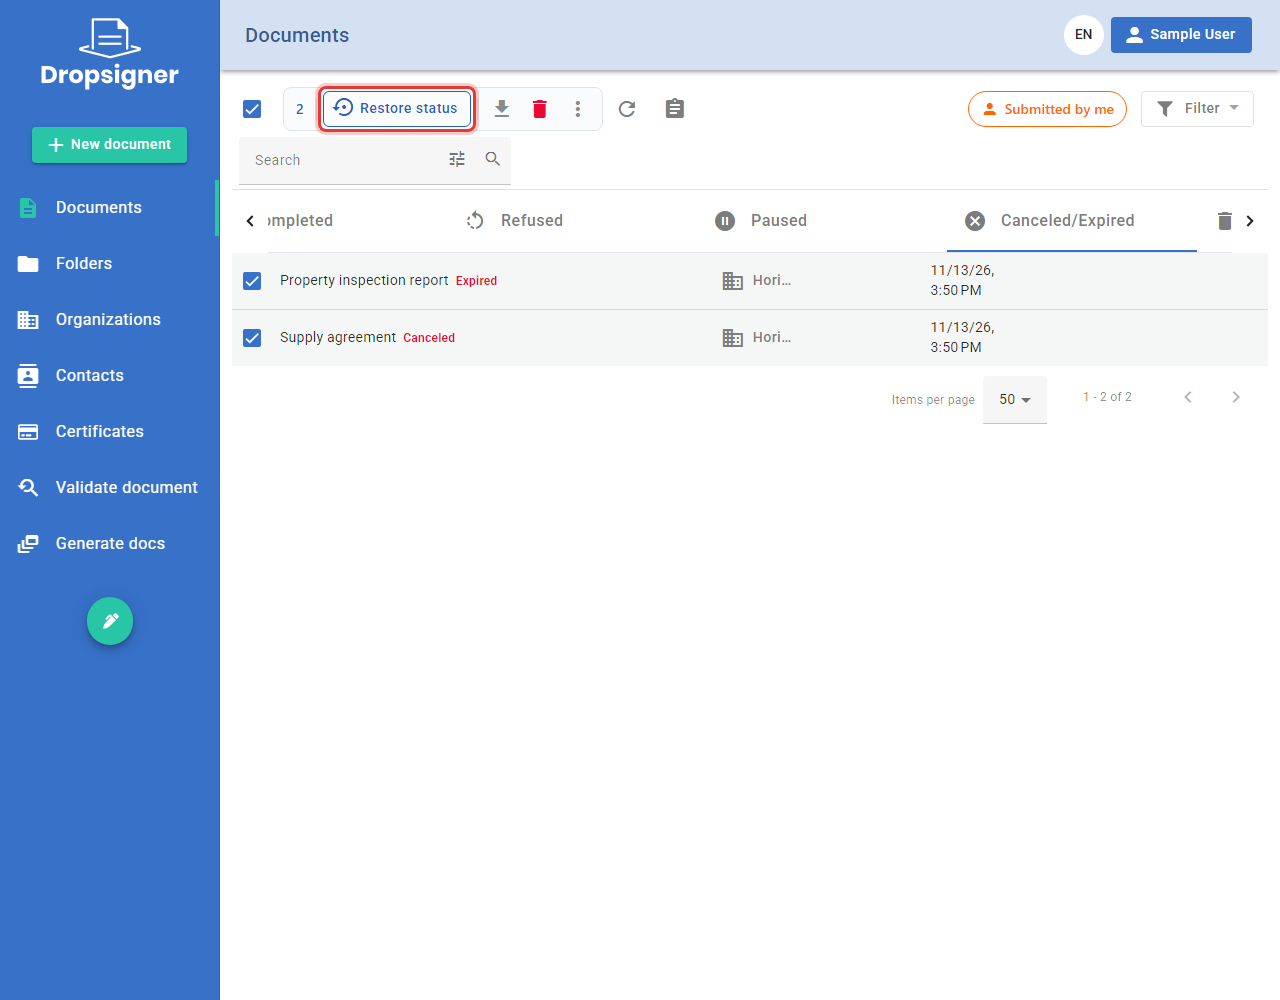
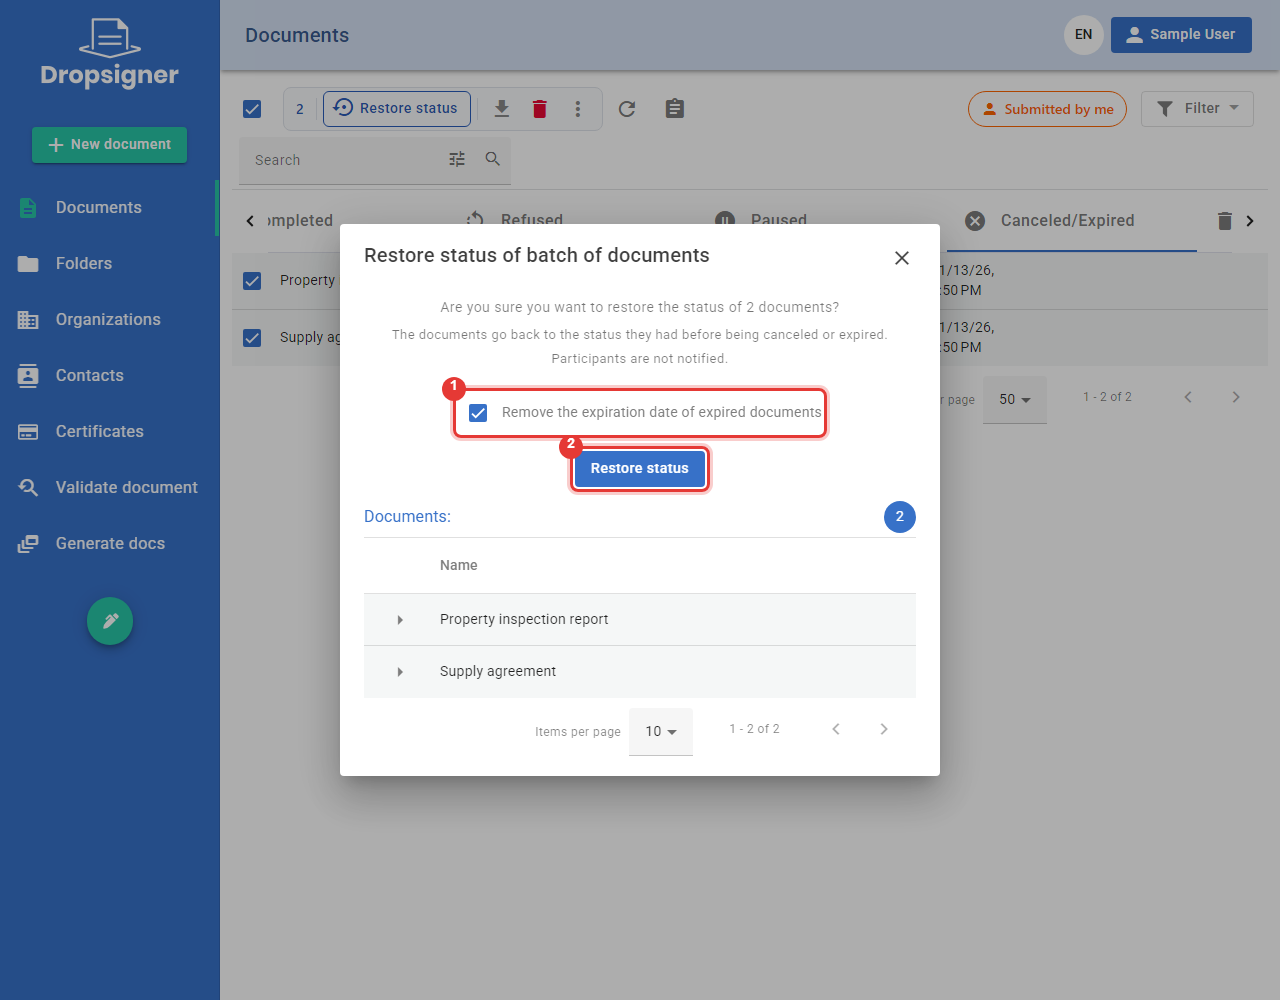
Select the documents and click Restore status.
-
For expired documents to return to the flow, keep Remove the expiration date of expired documents ticked (1). Click Restore status (2). Participants are not notified.
-
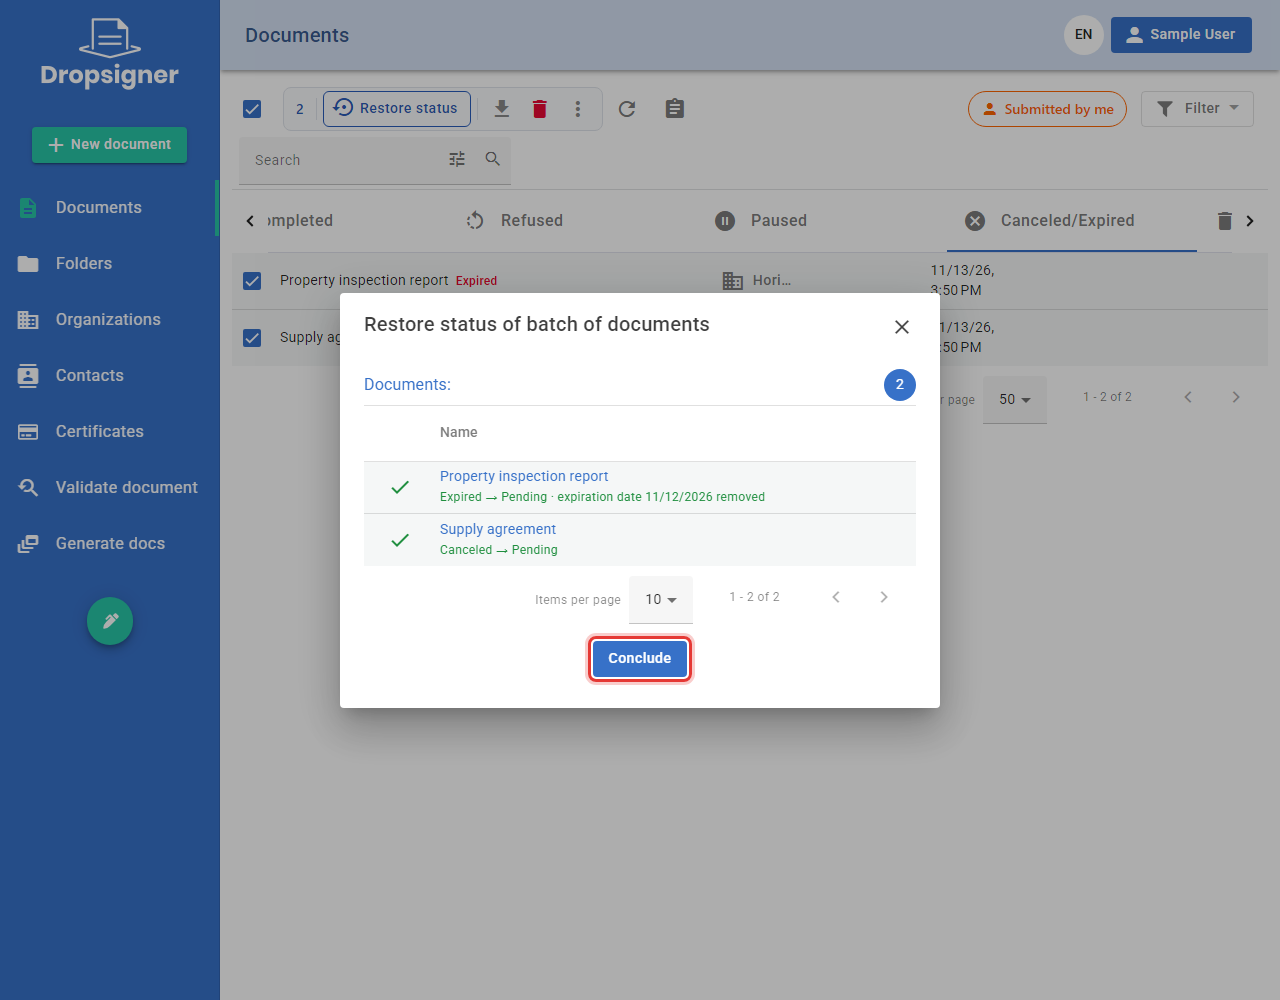
The result shows the previous and the new status of each document. Click Conclude.
Learn more in Canceled or expired documents.
Restore a document from its page
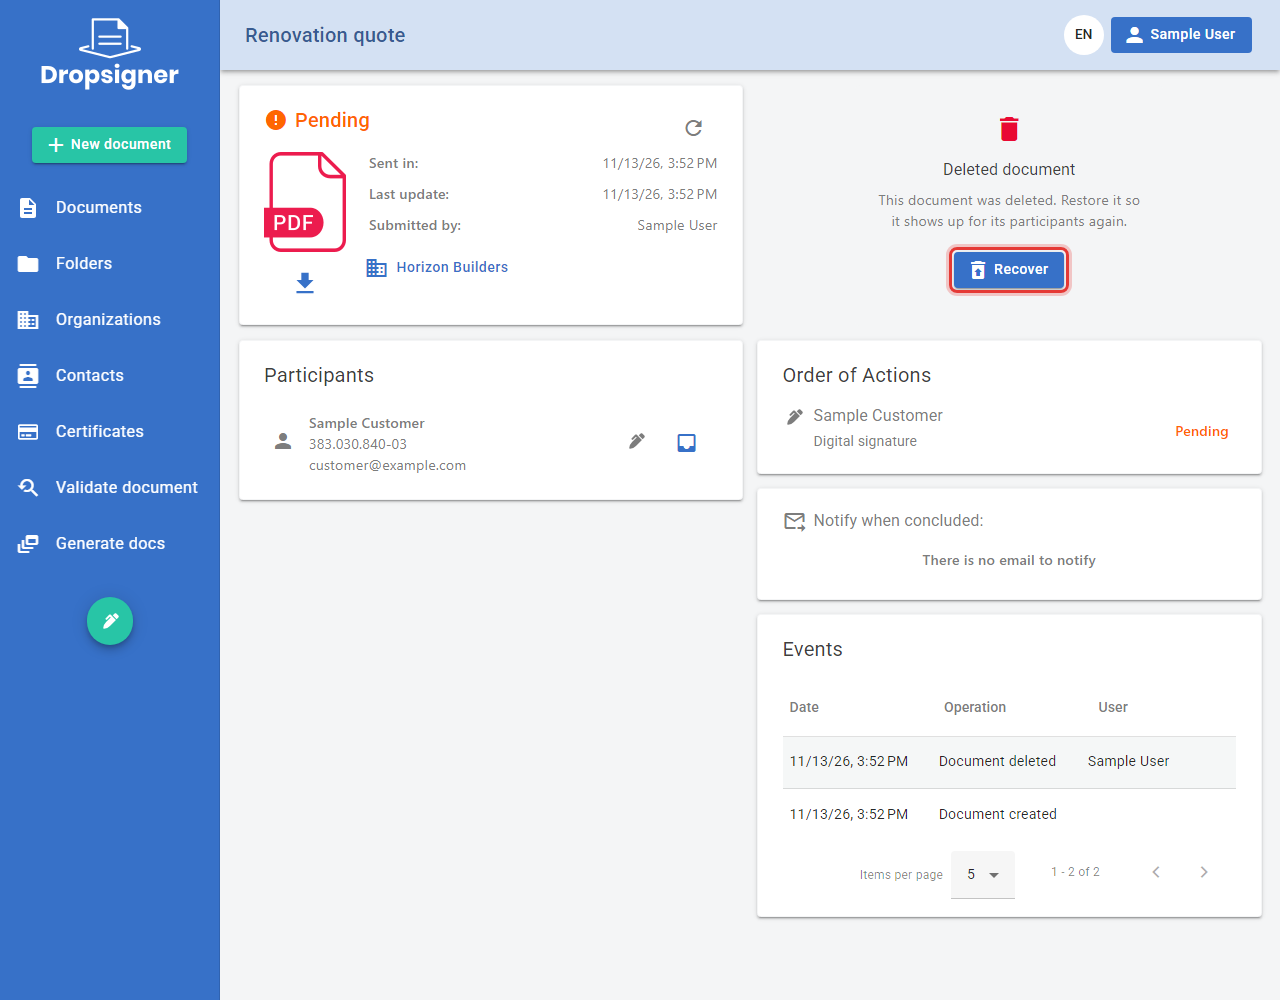
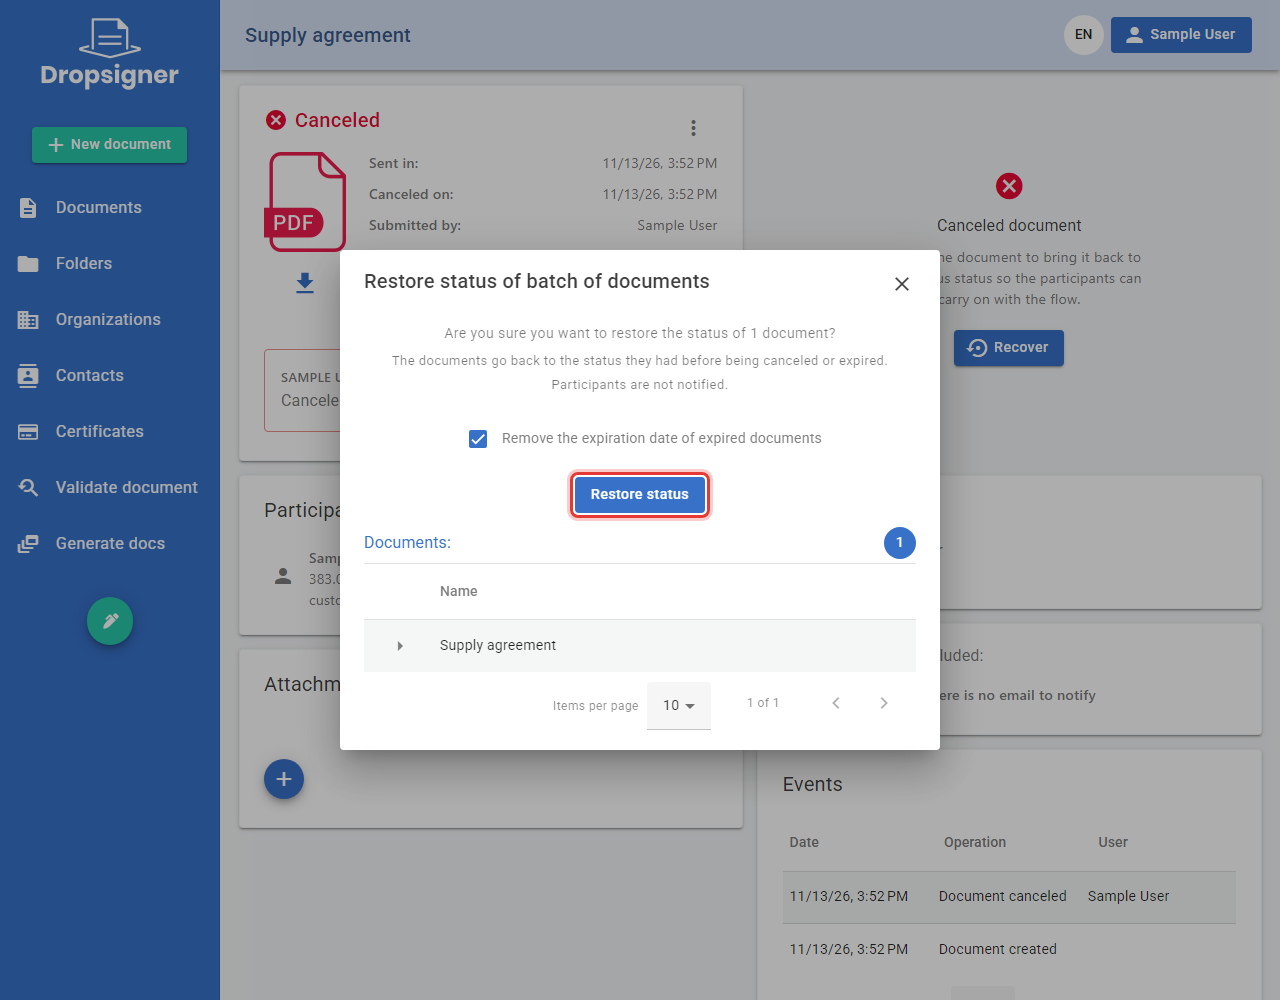
When opening a deleted, canceled or expired document, organization administrators see a notice with the Recover button.
-
Deleted document: click Recover and confirm with Restore.
-
Canceled or expired document: click Recover.
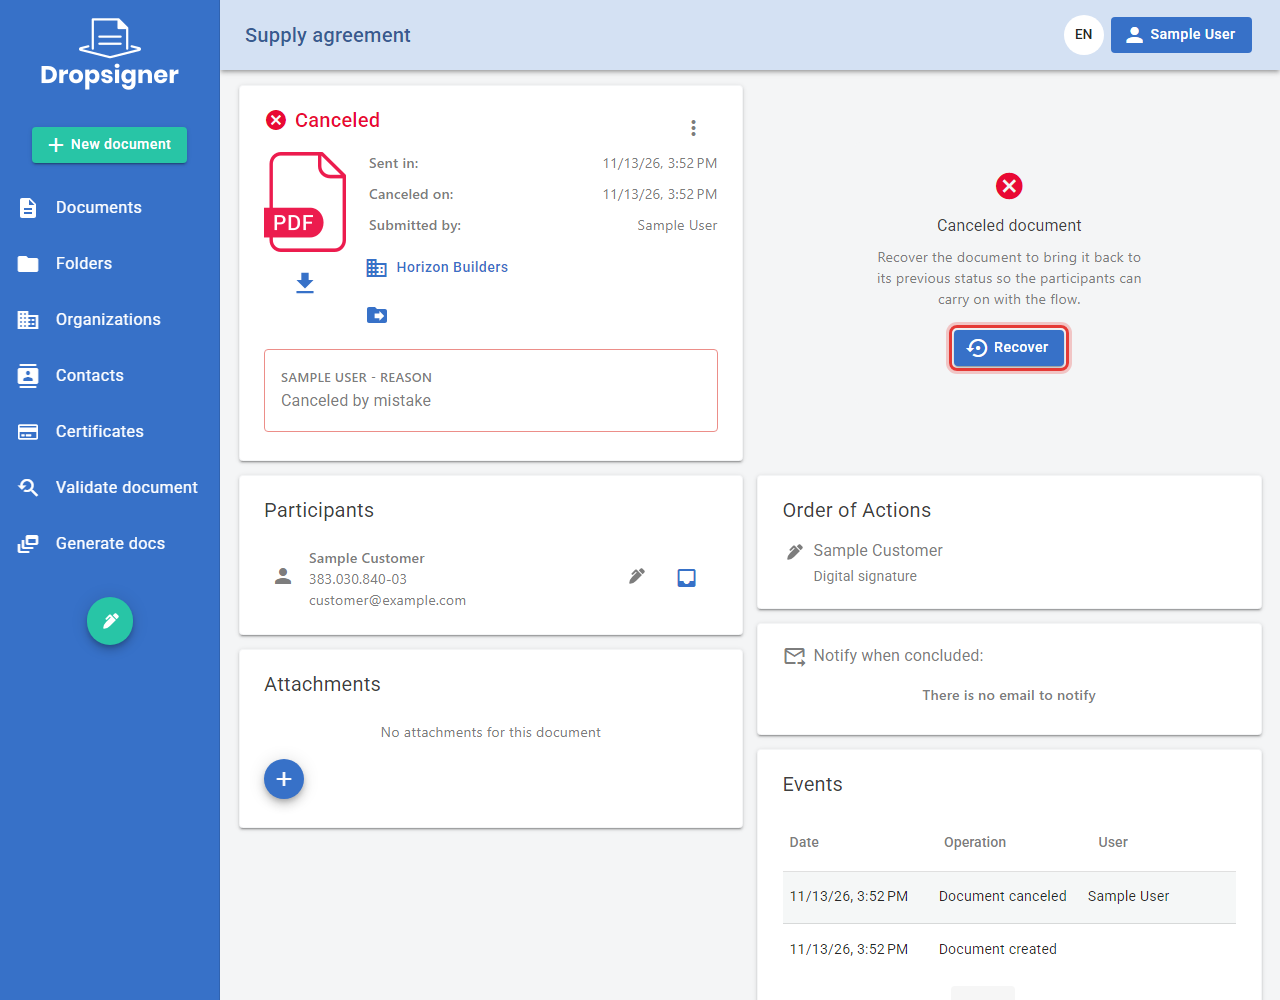
Then confirm with Restore status.
Only the organization's Administrator profile sees the Deleted tab and the restore buttons, and only for documents of the organizations they manage. Personal accounts do not have this option.
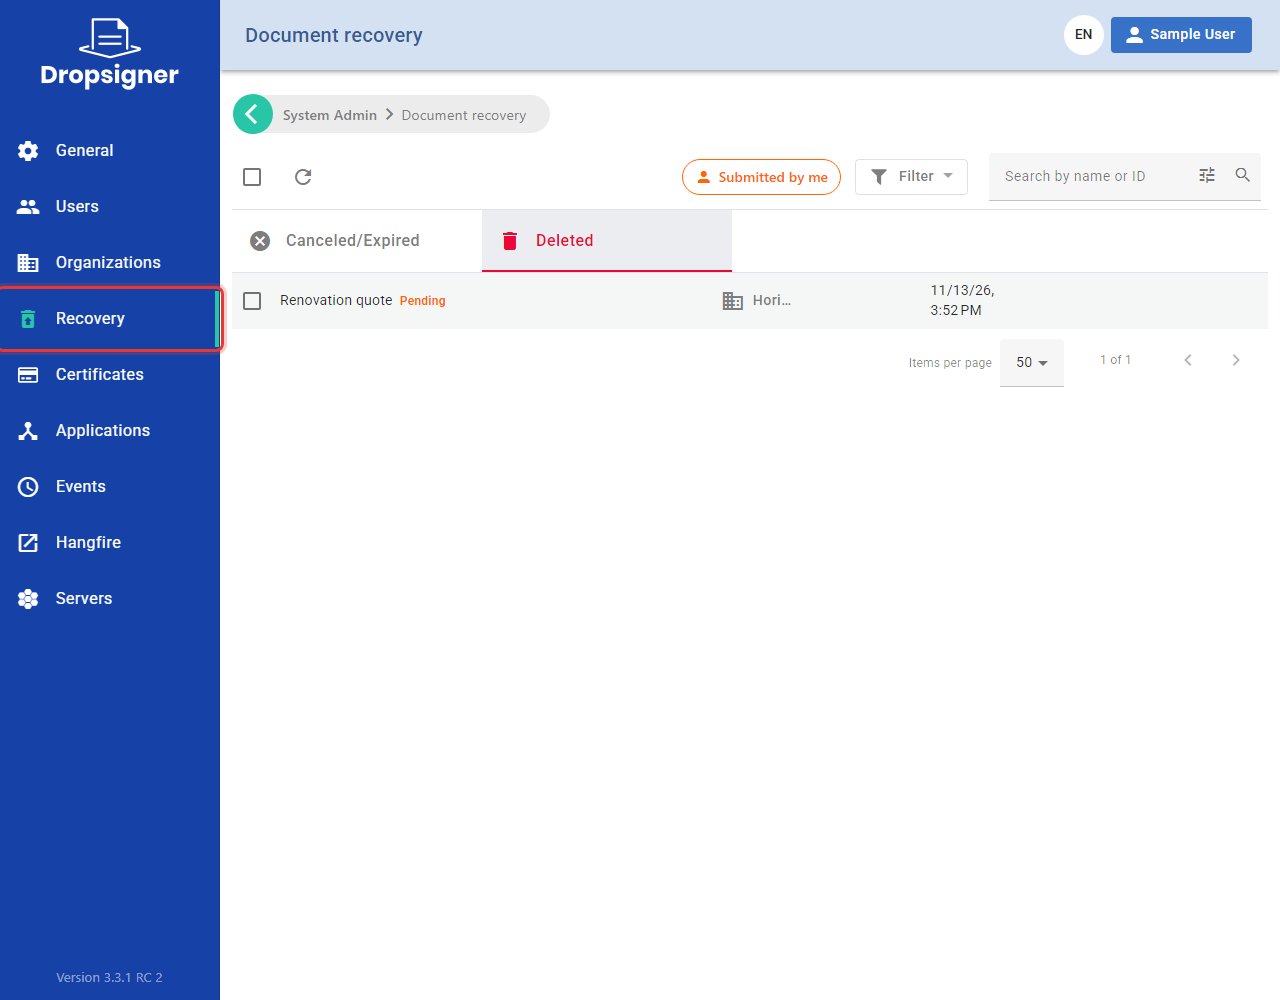
The system administrator restores documents of any organization in System Admin > Recovery, with the Canceled/Expired and Deleted tabs.
Learn more in From the document page and Recovery screen.