What's new in version 3.3.0
This page shows, step by step, how to use what arrived in version 3.3.0 of Signer. In each image, the place to click is marked in red. When there is more than one, the numbers give the order.
The full technical list, with the bug fixes, is in the changelog.
For people who sign and send documents
- Filter documents by submitter and by period
- Sign several documents at once, without logging in
- Social name
- Place signatures with anchor texts
For organization administrators
- Recover deleted documents
- Hide the CPF in the signature mark
- Restore canceled or expired documents (system administrator)
Some features depend on an instance setting. When that is the case, the section says which one. Each setting is described in the changelog.
Filter documents by submitter and by period
In the document list, you now find what you are looking for faster: you can see only the documents you sent, the ones a colleague sent, or the ones sent in a period. Learn more in Finding your documents.
See only the documents I sent
-
In the left menu, click Documents.
-
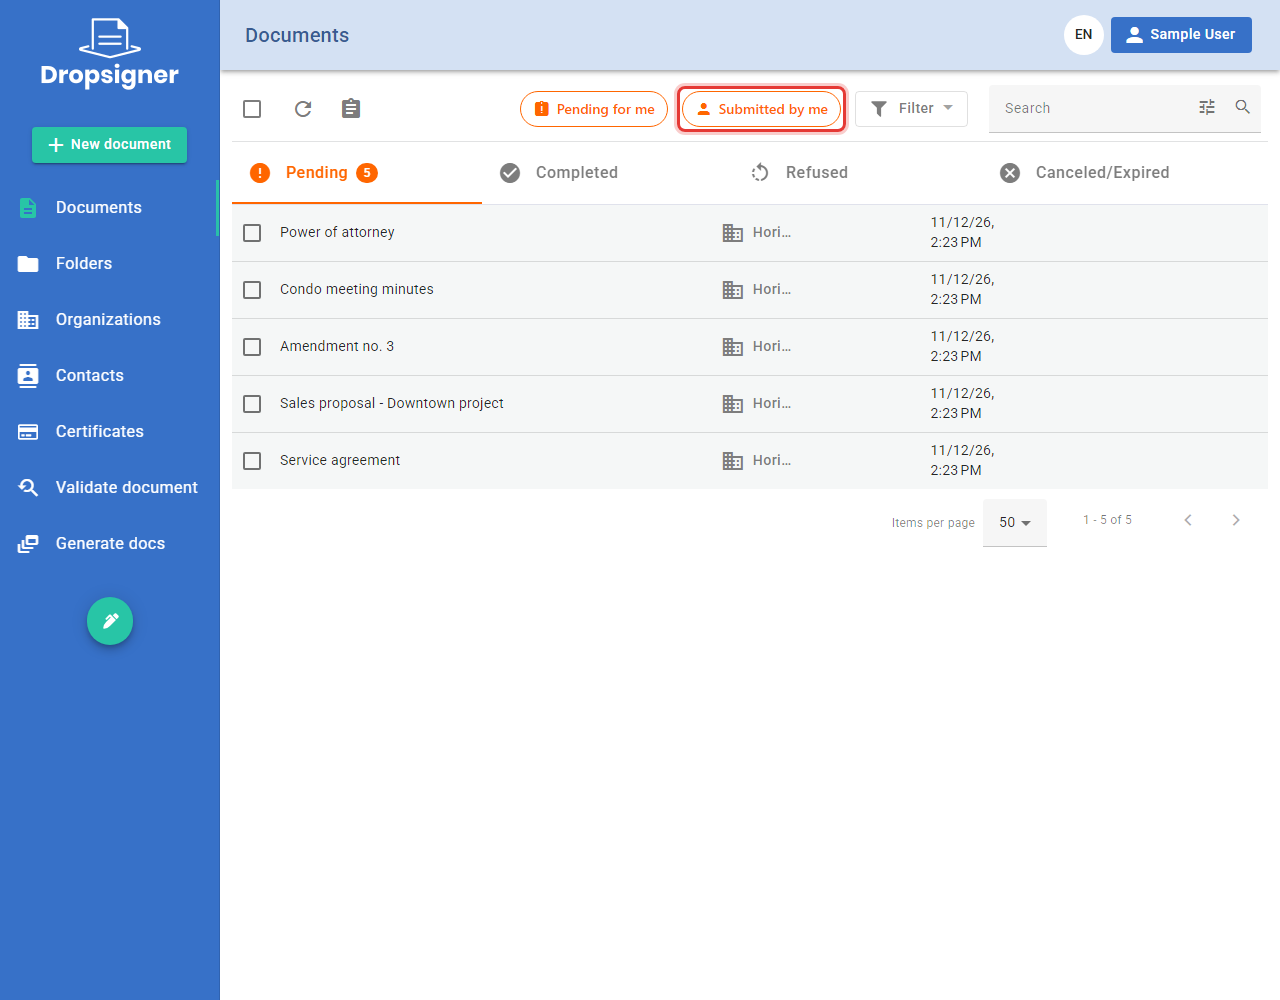
Click the Submitted by me button.
-
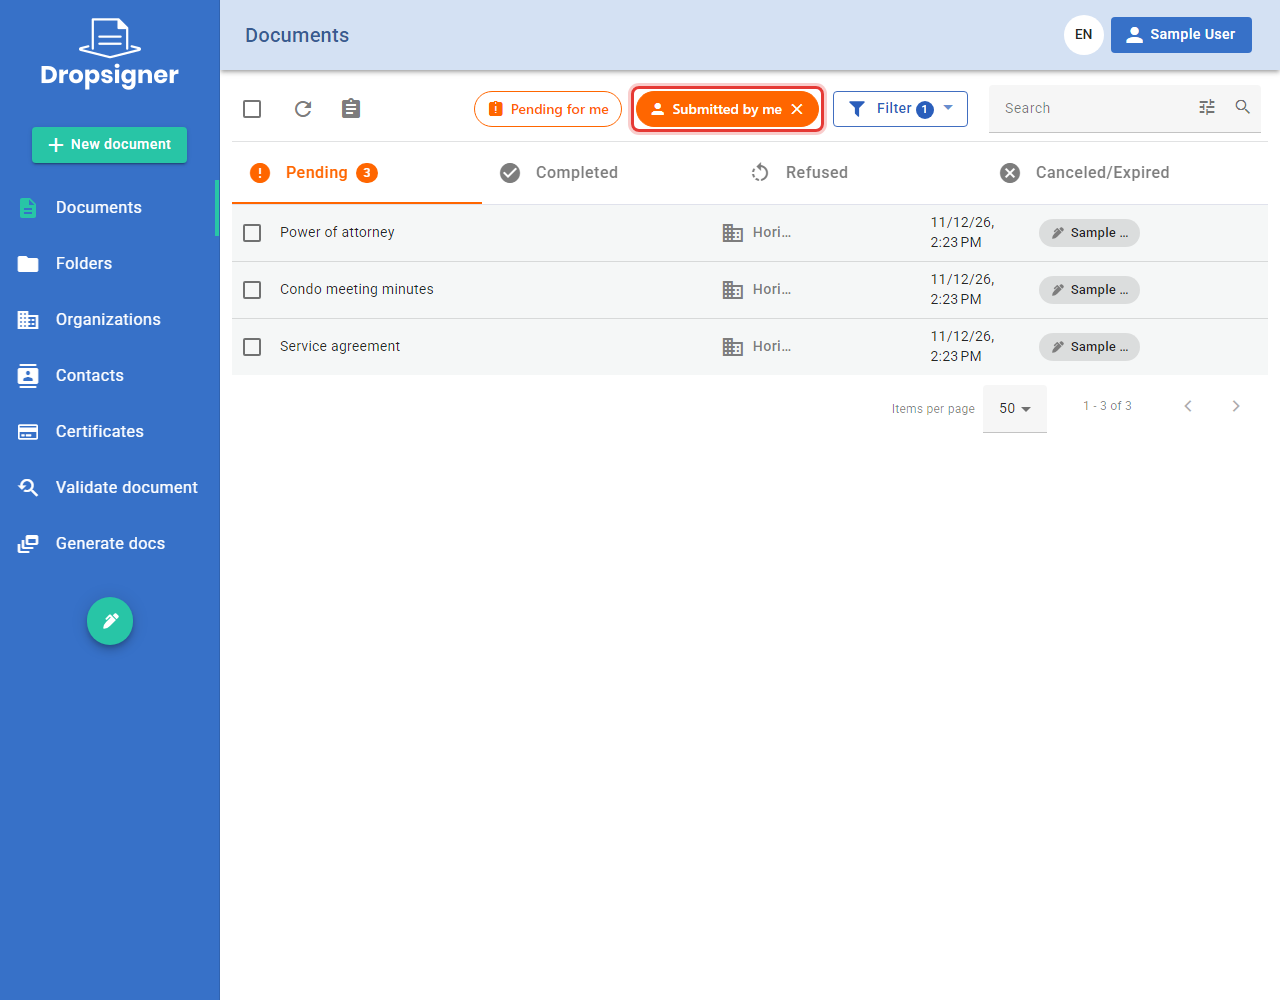
The list now shows only the documents you sent. The button turns solid and the Filter button shows how many filters are on. To see everything again, click the X on the button.
Filter by who sent and by period
-
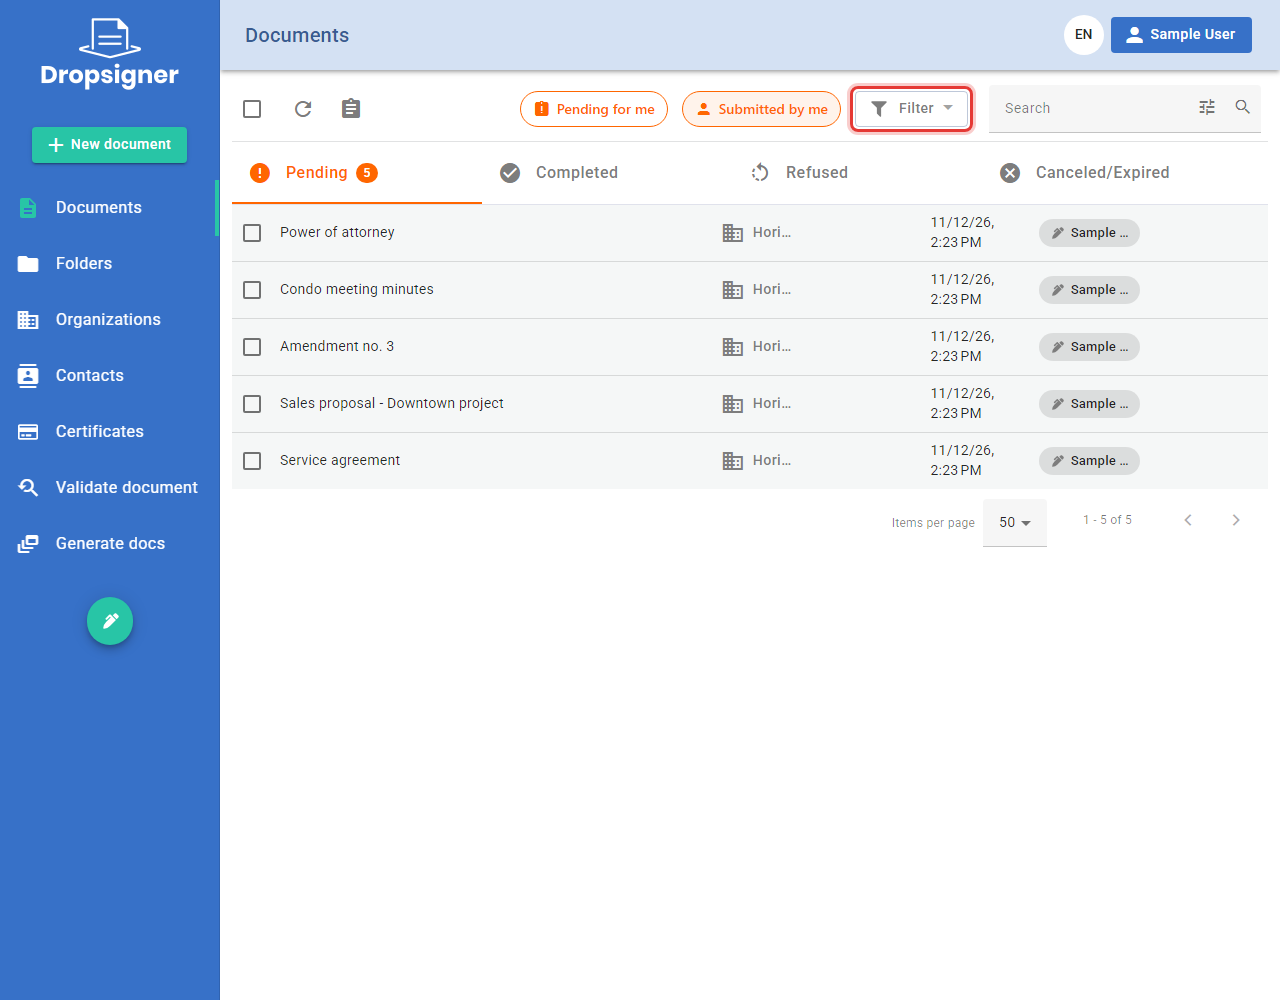
In the document list, click Filter.
-
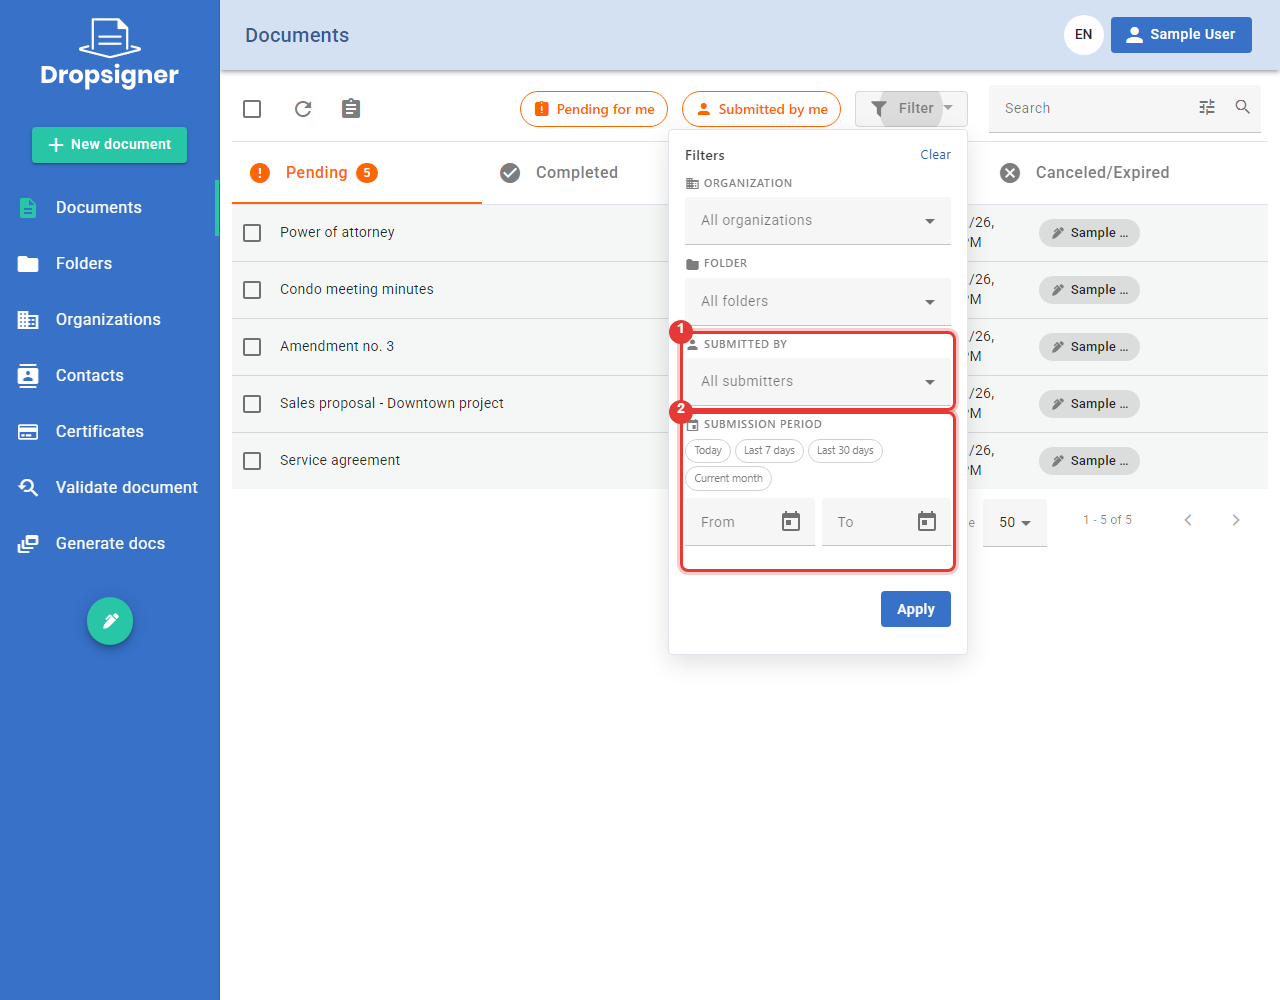
The Filters panel opens with two new fields: Submitted by (who sent the document) (1) and Submission period (2).
-
Click Submitted by, type part of the person's name and pick them from the list.
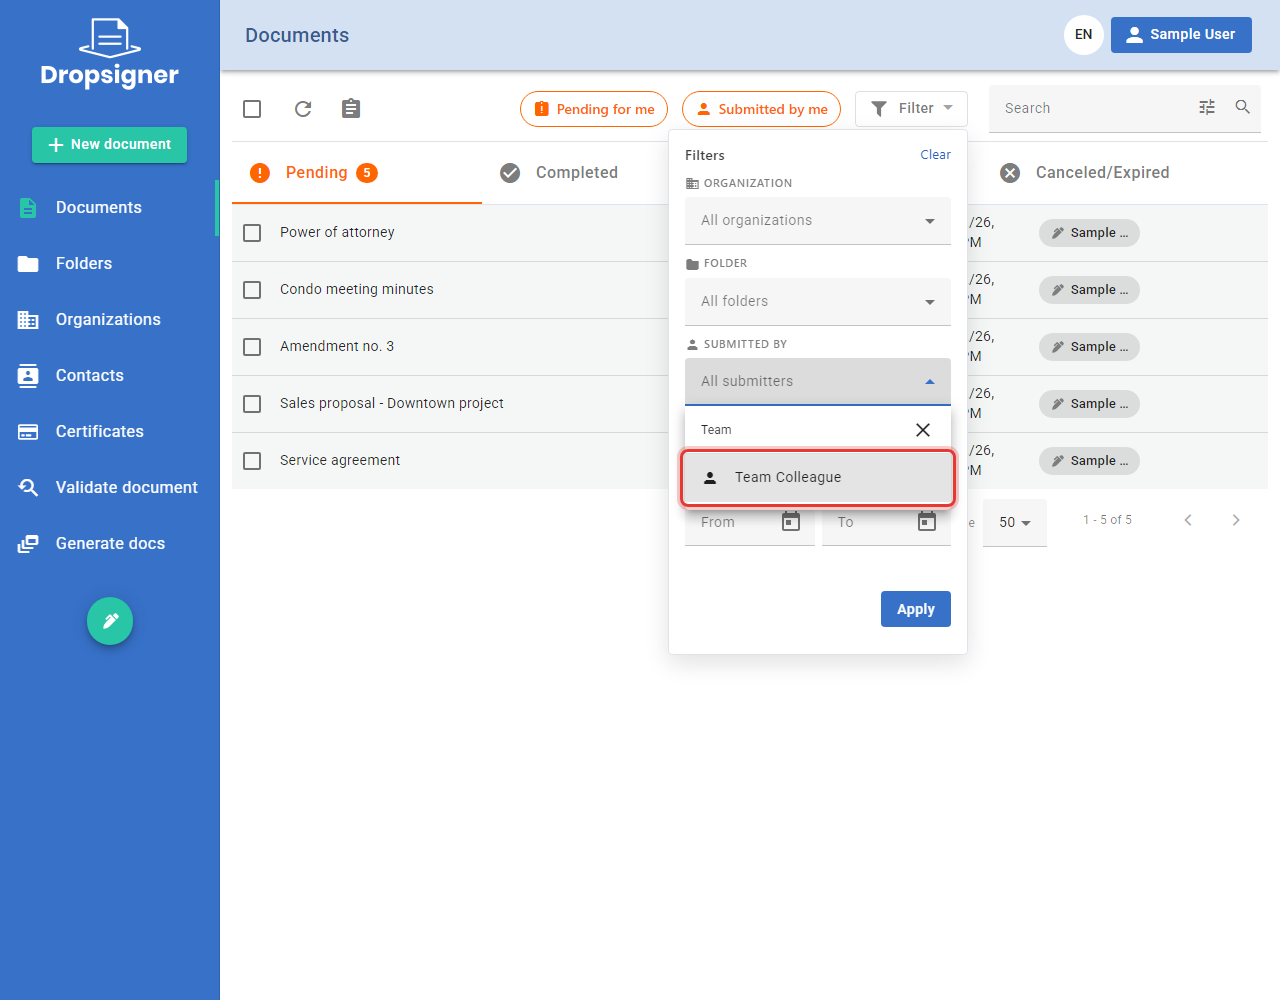
-
Under Submission period, pick a shortcut (Today, Last 7 days, Last 30 days or Current month) or fill in the From and To dates.
-
Click Apply.
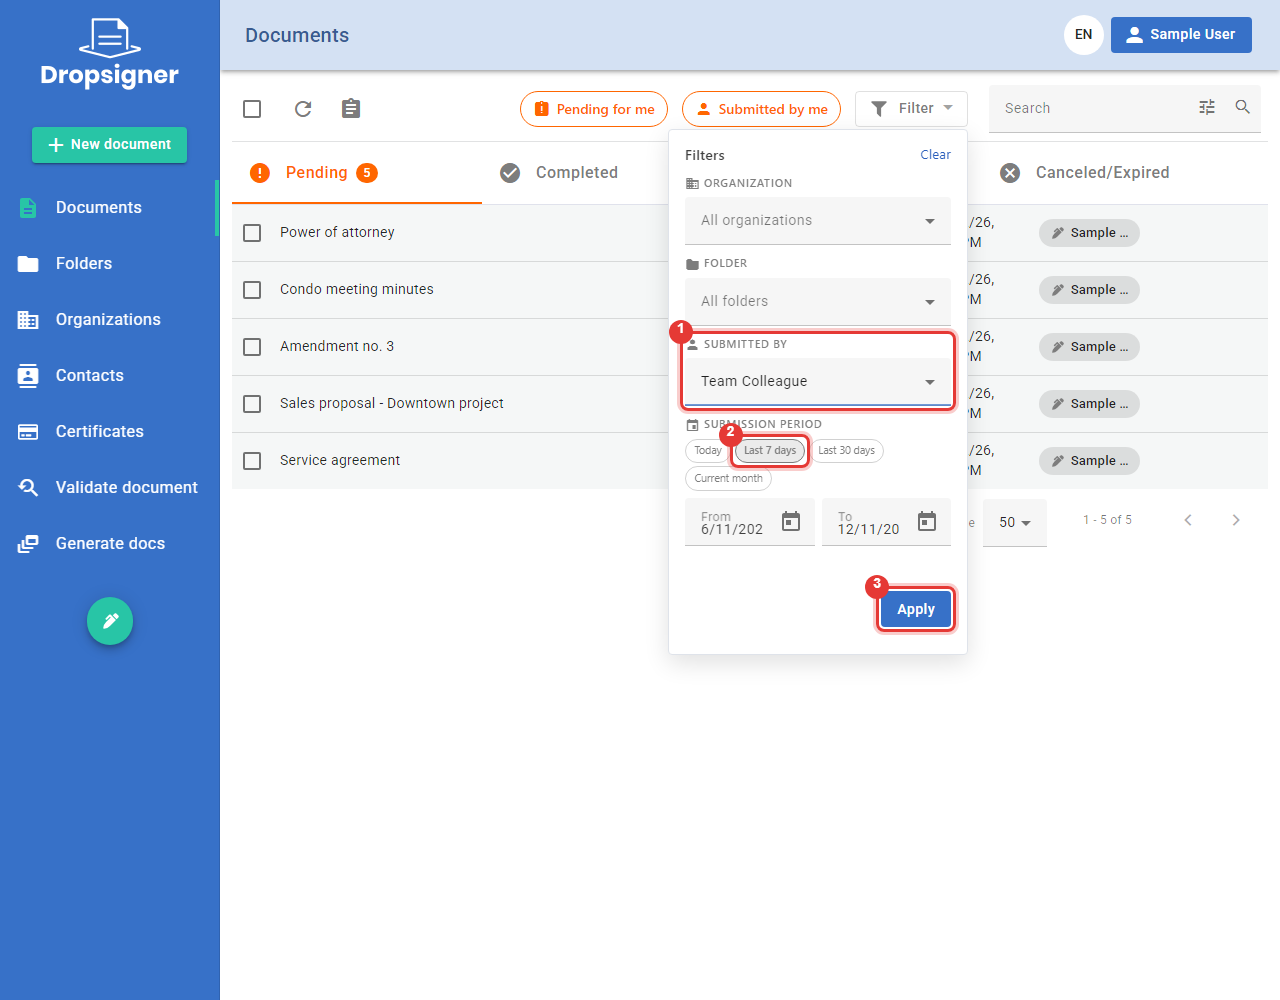
-
The list shows only the documents that match the filters, and the Filter button shows how many are on. The filters stay on when you leave the list and come back. To undo them, open the panel and click Clear.
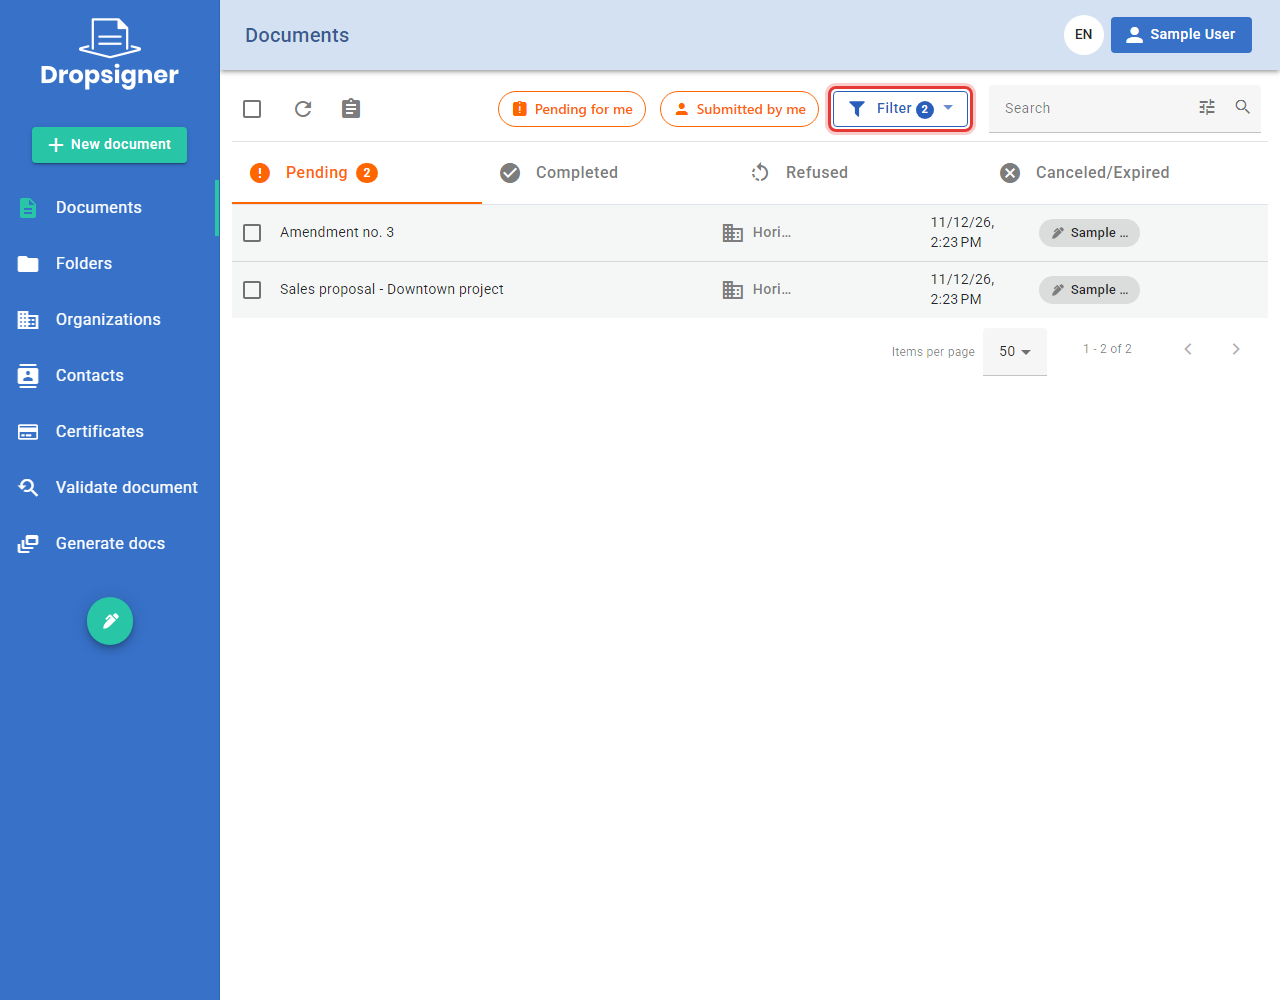
The Submitted by field lists the people of the organizations you can see. In a personal account, use the Submitted by me button.
Sign several documents at once, without logging in
When someone has several documents waiting for their signature, Signer sends a single e-mail with all of them. Now the button in that e-mail opens a screen where the person signs them all at once, without creating an account or logging in, and follows the progress.
-
Open the e-mail with the pending documents and click View documents.
-
The screen shows who sent them, how many documents are waiting for your signature, and their list. Click Review and sign.
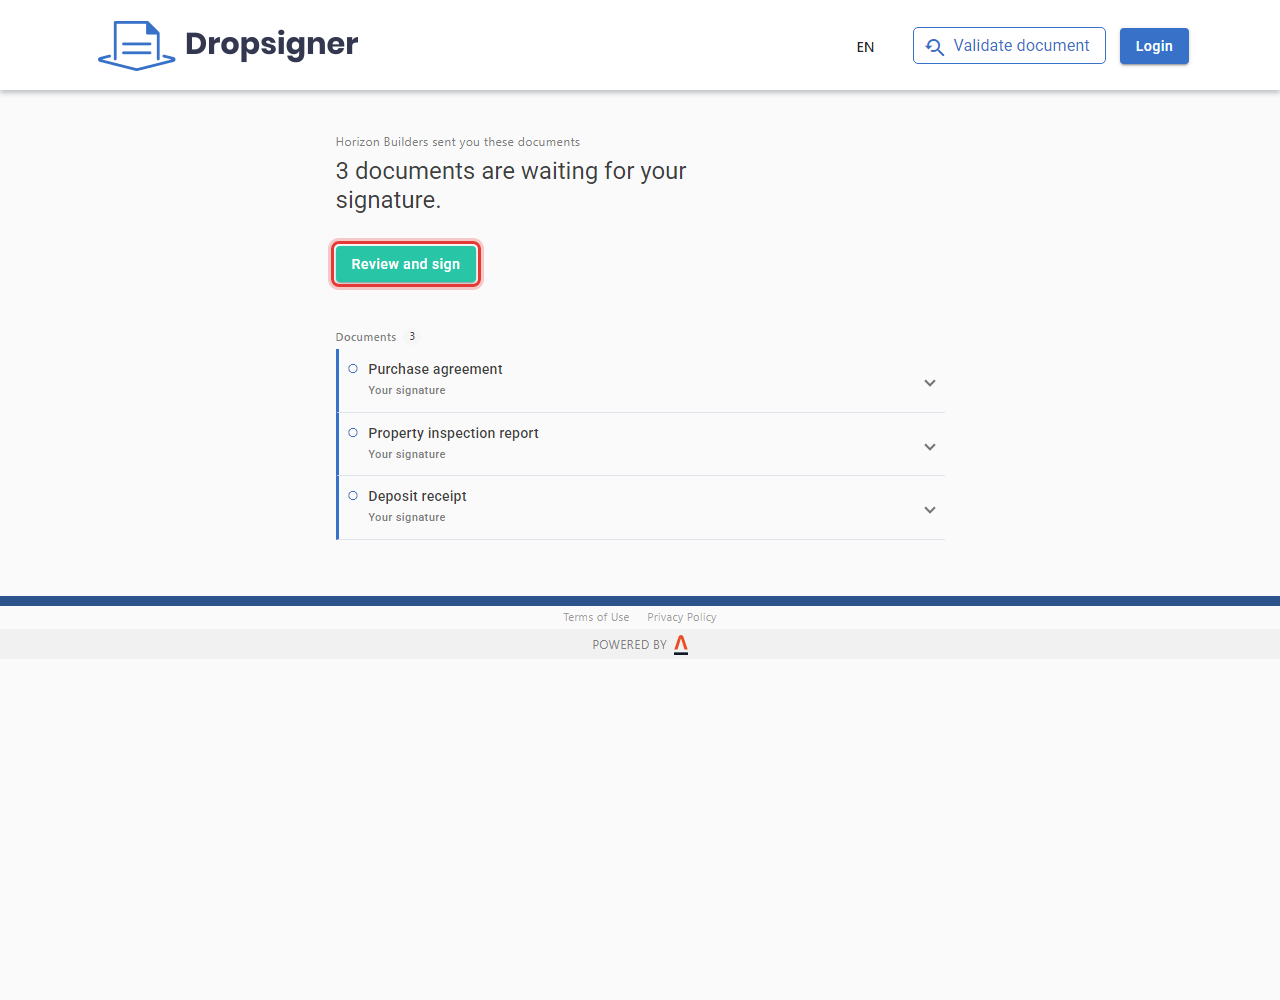
-
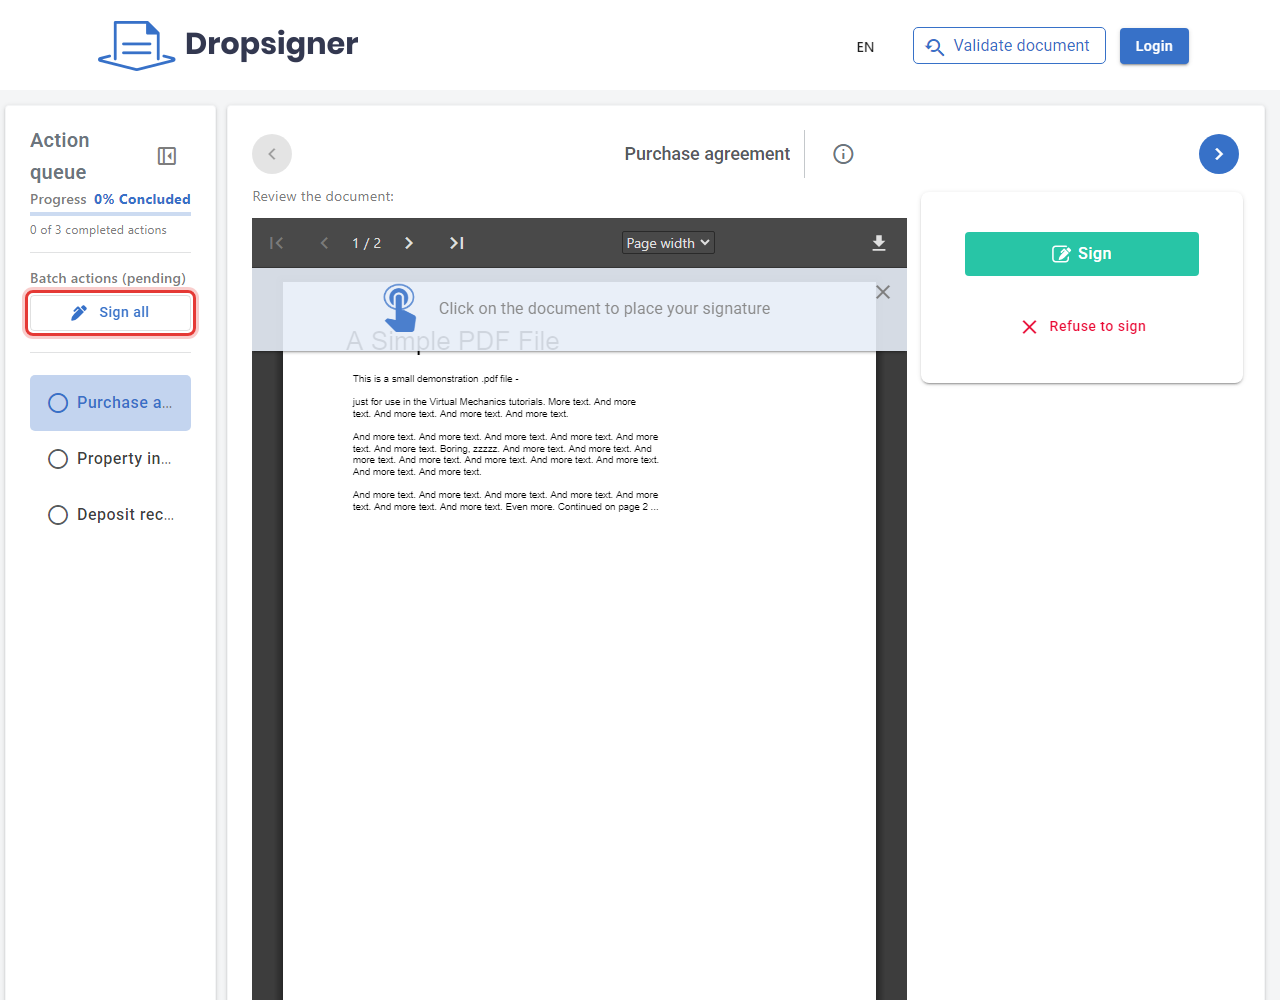
You can review one document at a time or, in the Action queue column, click Sign all to sign them all together.
-
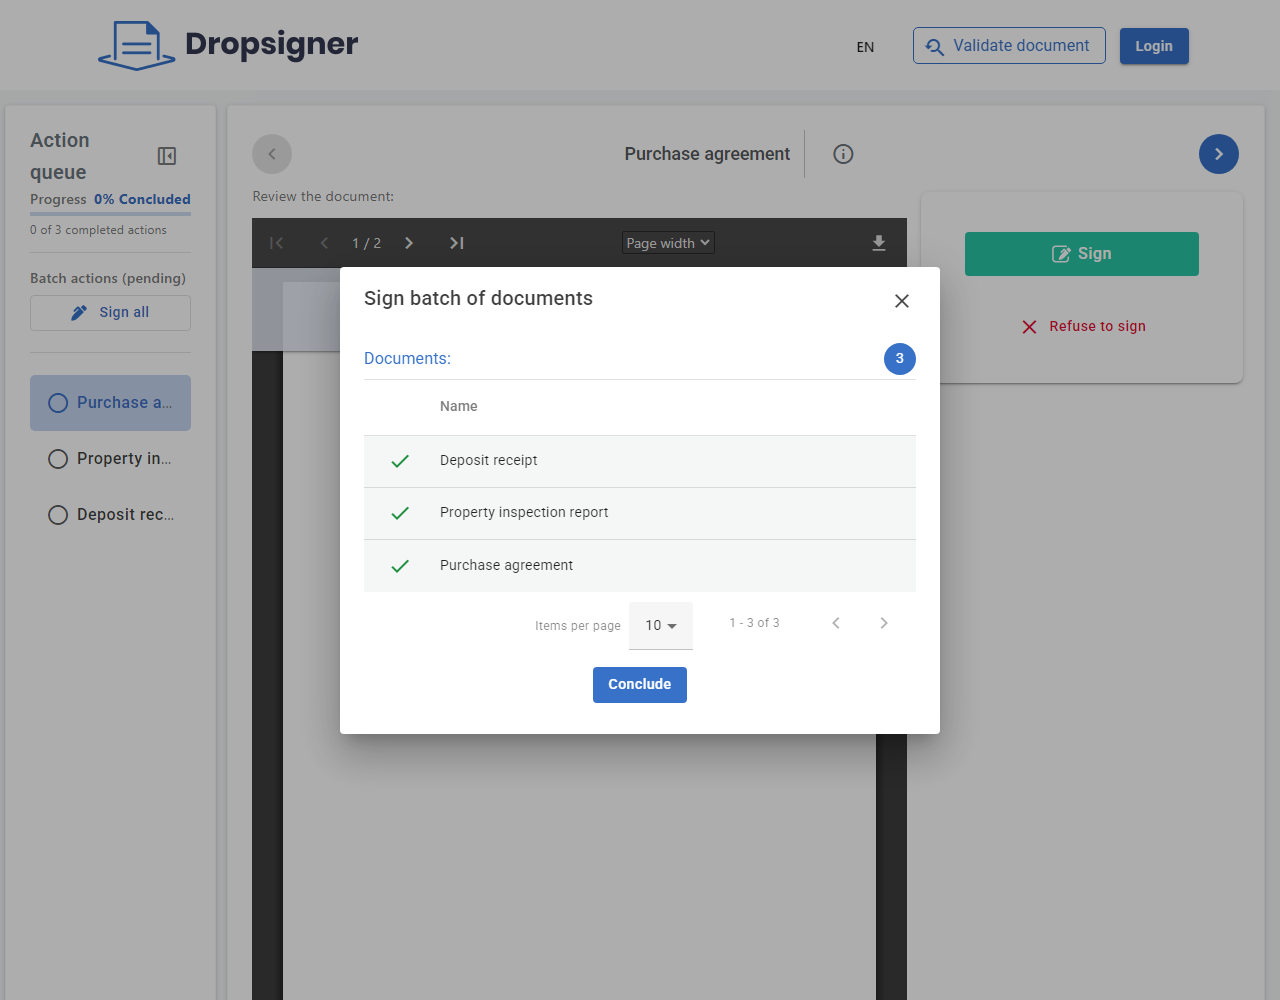
Confirm the signature. Each document gets a green check when it is signed. Click Conclude.
-
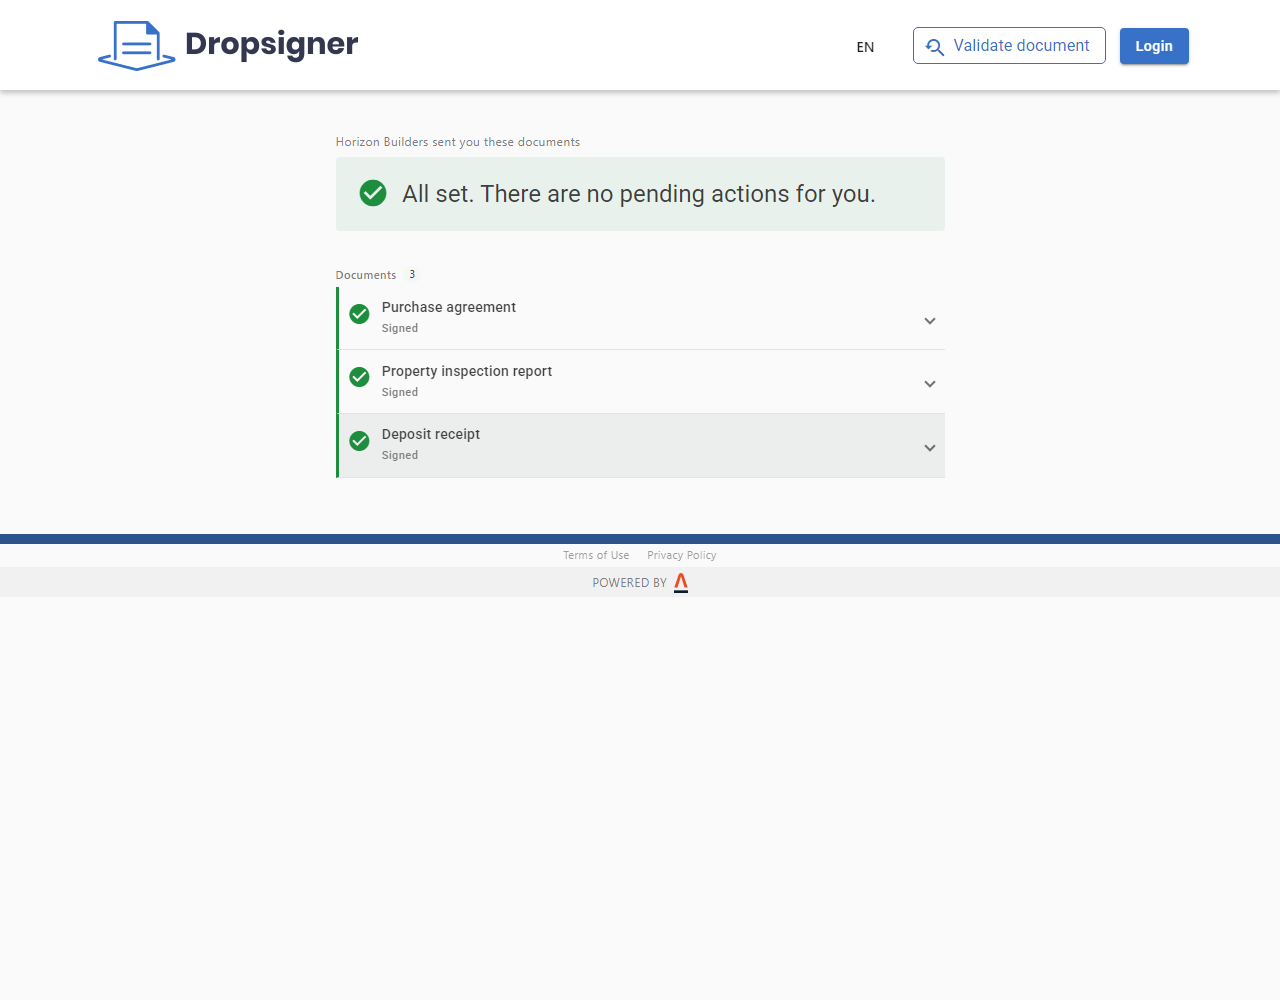
If you open the same link again, you see that everything is done and which documents were signed.
This flow works when the General:PublicBatchSignatureEnabled setting is on.
Learn more in Signing several documents from the e-mail.
Social name
Signer now uses a person's social name. When it is registered, it replaces the legal name across the system, in the signature mark, in the printer-friendly version, in e-mails and on the validation page.
Register the social name
The social name is registered by the Signer system administrator.
-
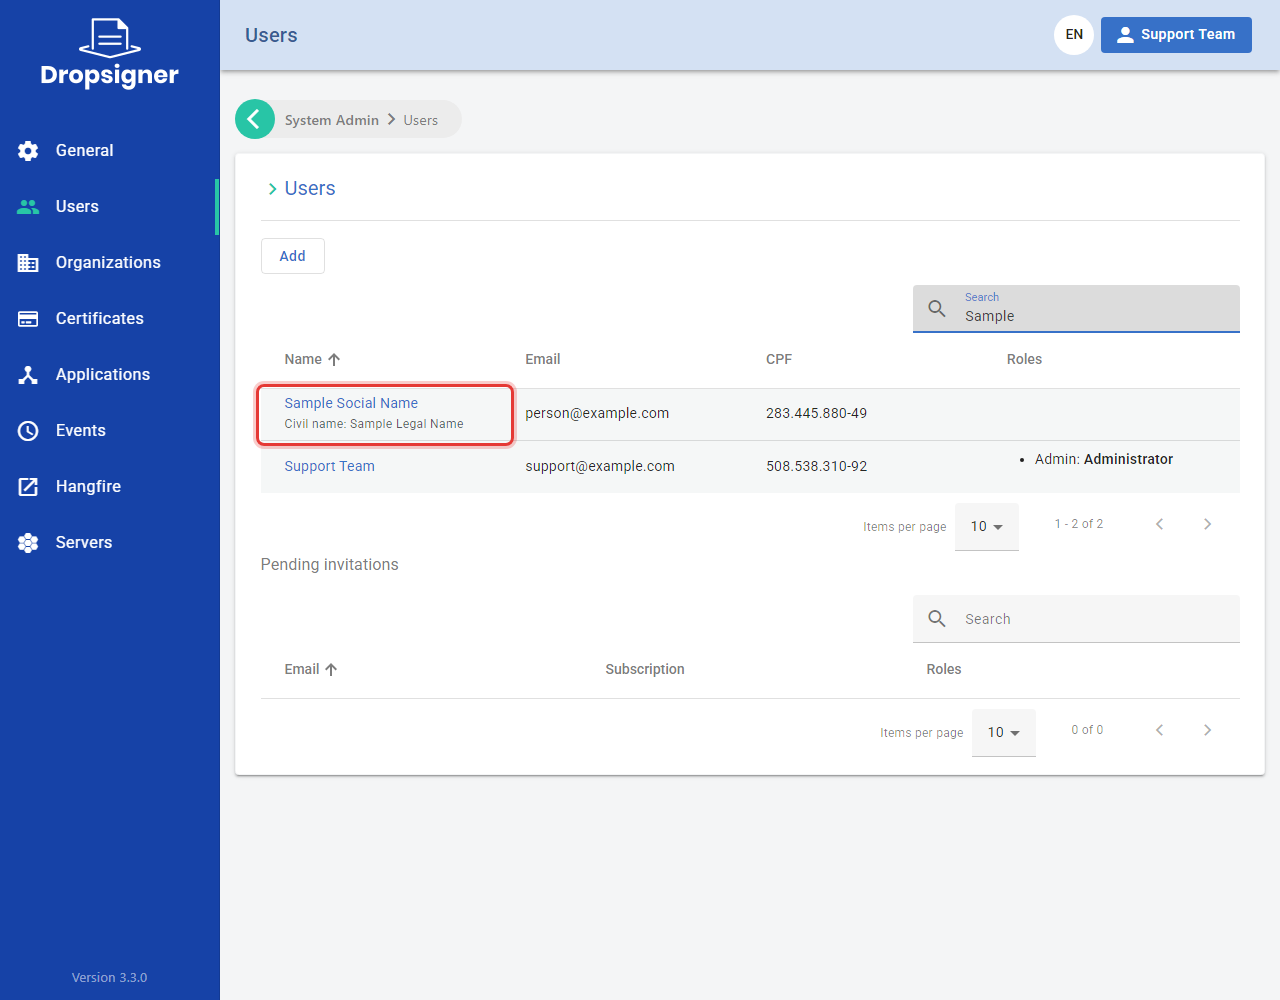
In System Admin, open Users, find the person and open their details.
-
Click Edit.
-
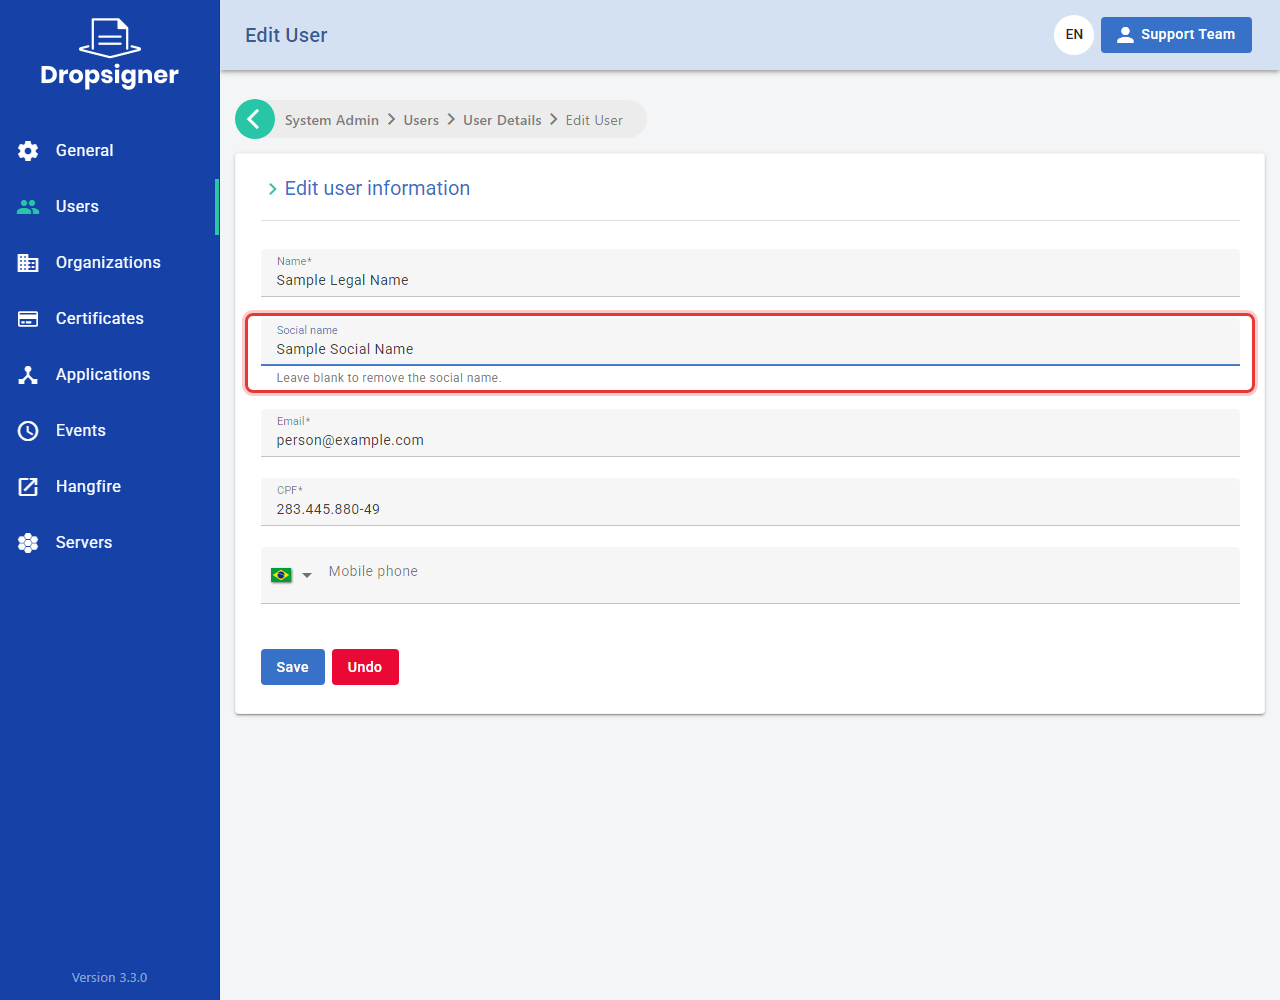
Fill in the Social name field and click Save. To remove the social name, leave the field blank and save.
-
In the user list, the person appears with the social name and, right below it, the legal name.
What the person sees
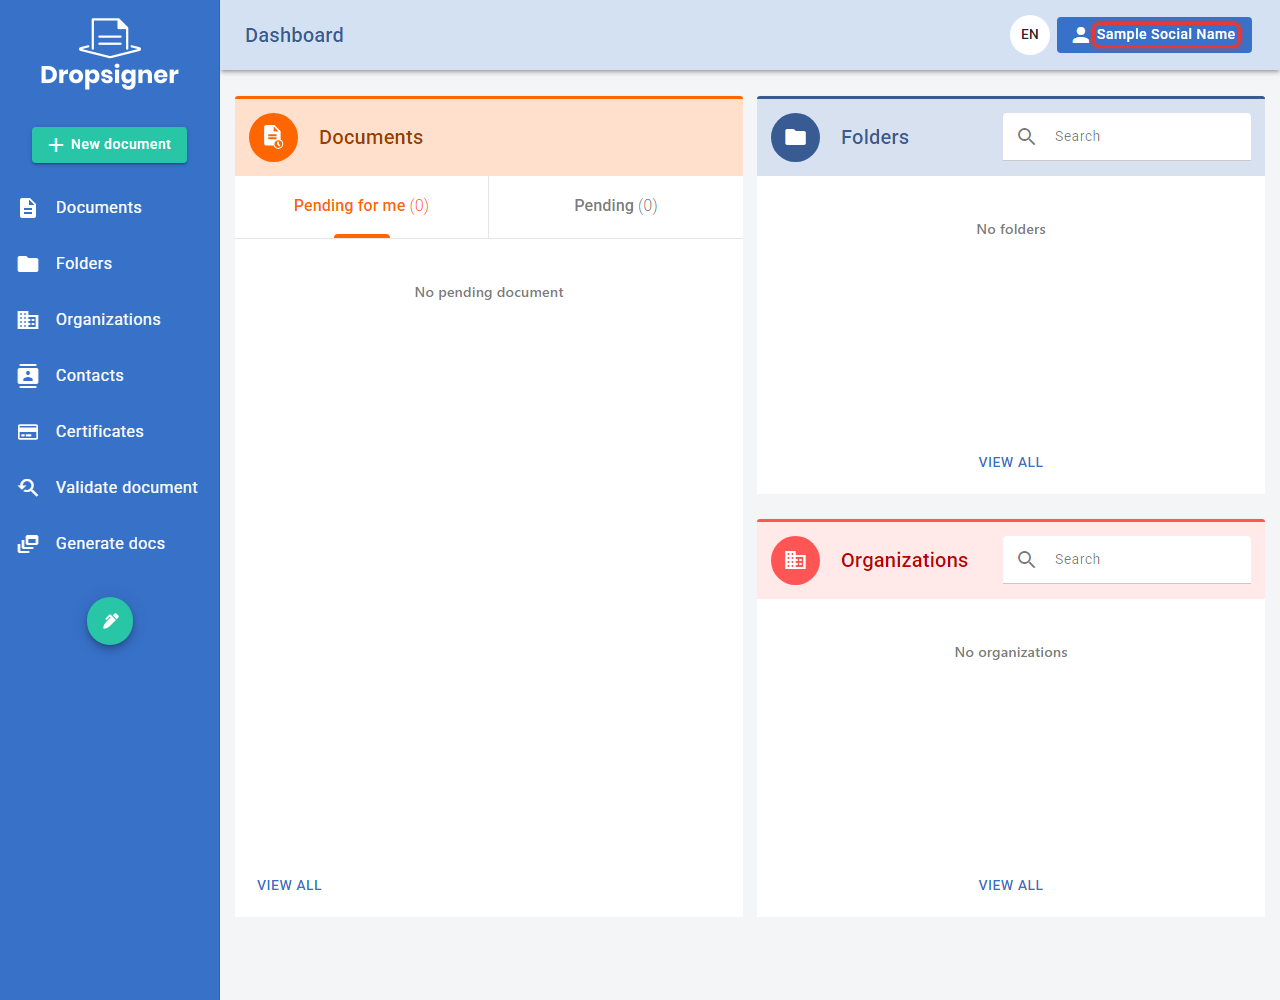
The social name appears at the top of the screen, next to the user menu:
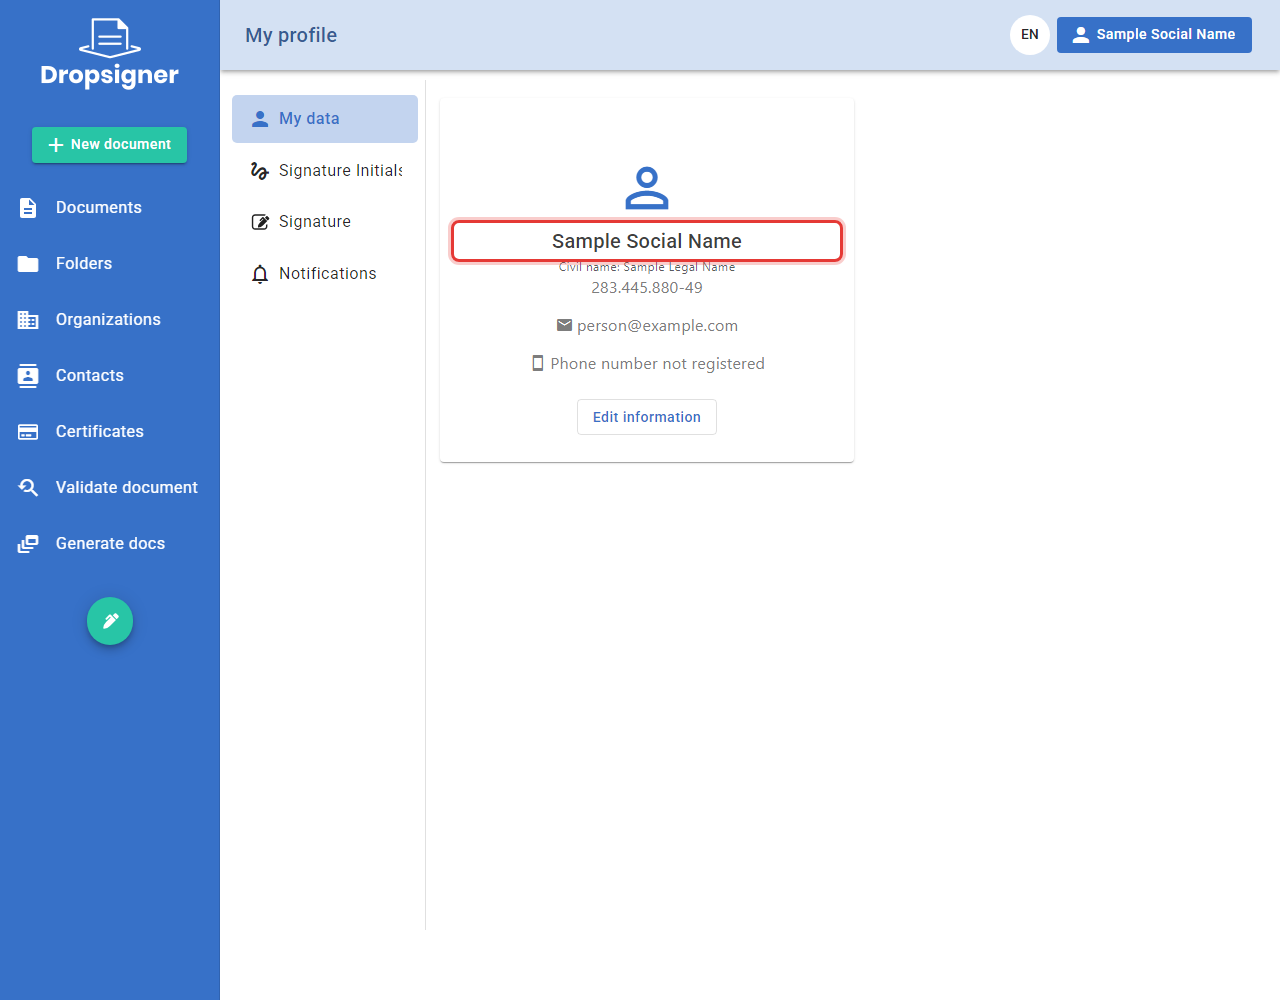
In My profile > My data, the social name appears with the legal name right below it:
The social name is available when the SocialName:Enabled setting is on.
Learn more in Social name and A user's social name.
Place signatures with anchor texts
You can now mark in the PDF itself where each person will sign, by writing a text between double brackets, such as
[[contractor]]. When you send the document, Signer places the signature over that text on its own, without anyone
clicking on the page.
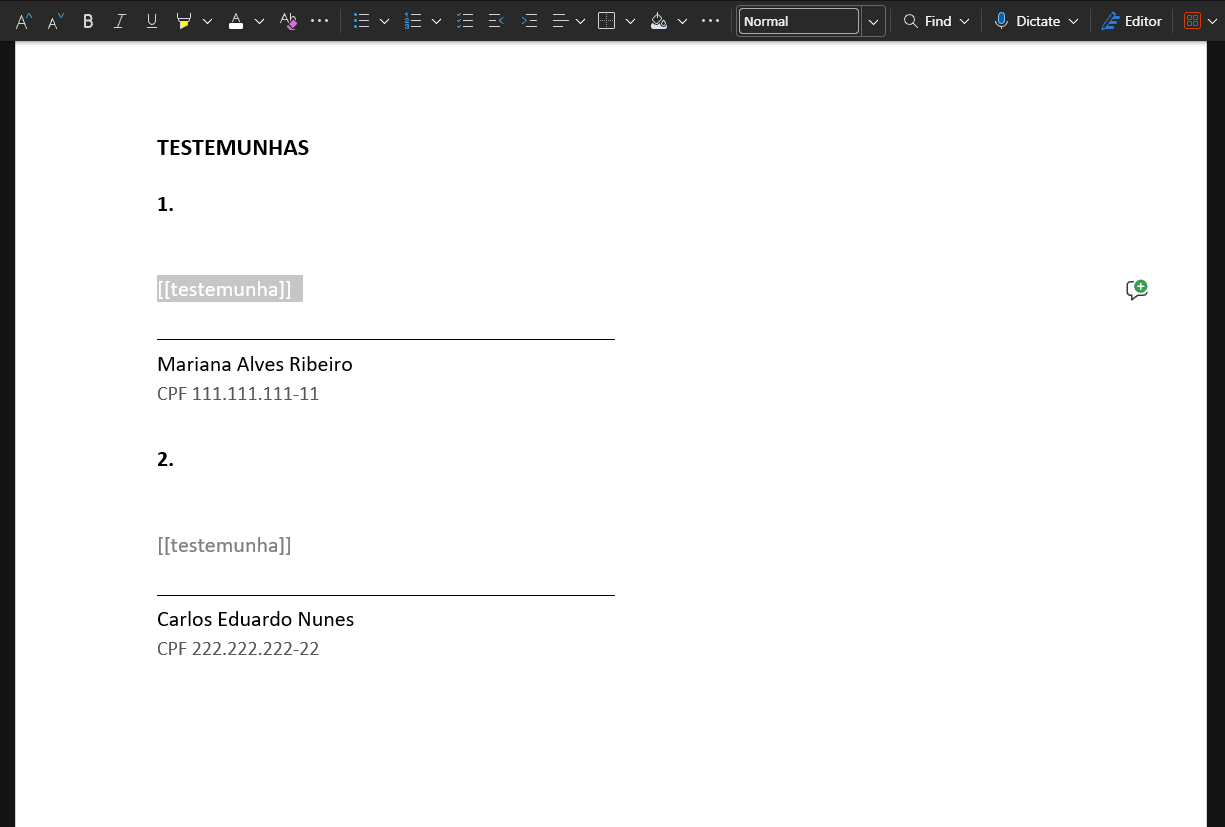
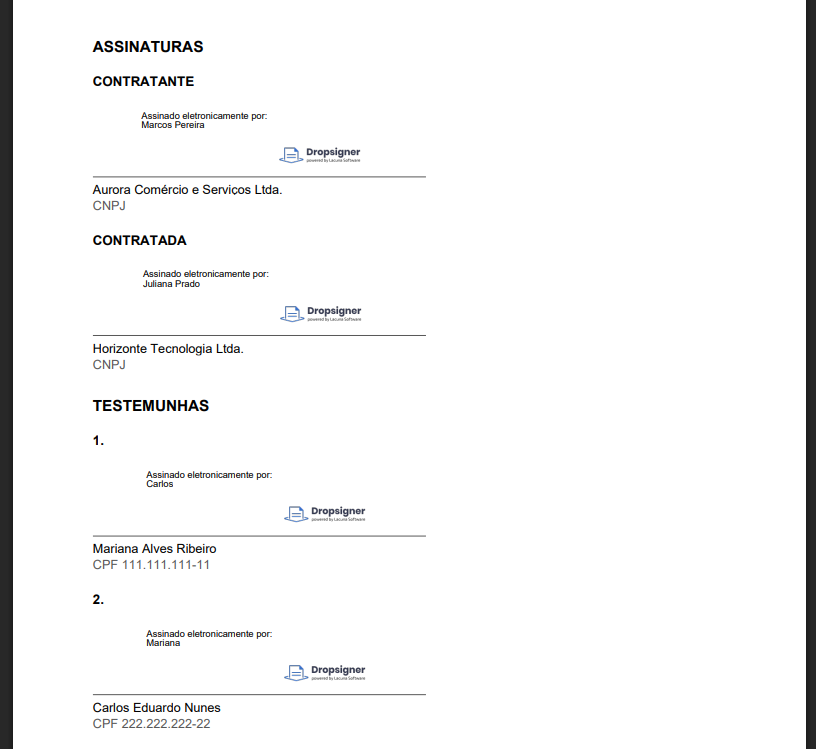
The full step by step is in the Anchor texts guide.
Recover deleted documents
Deleted a document by mistake? The organization administrator can now bring it back, to the same folder it was in.
-
In the left menu, click Organizations and choose the organization.
-
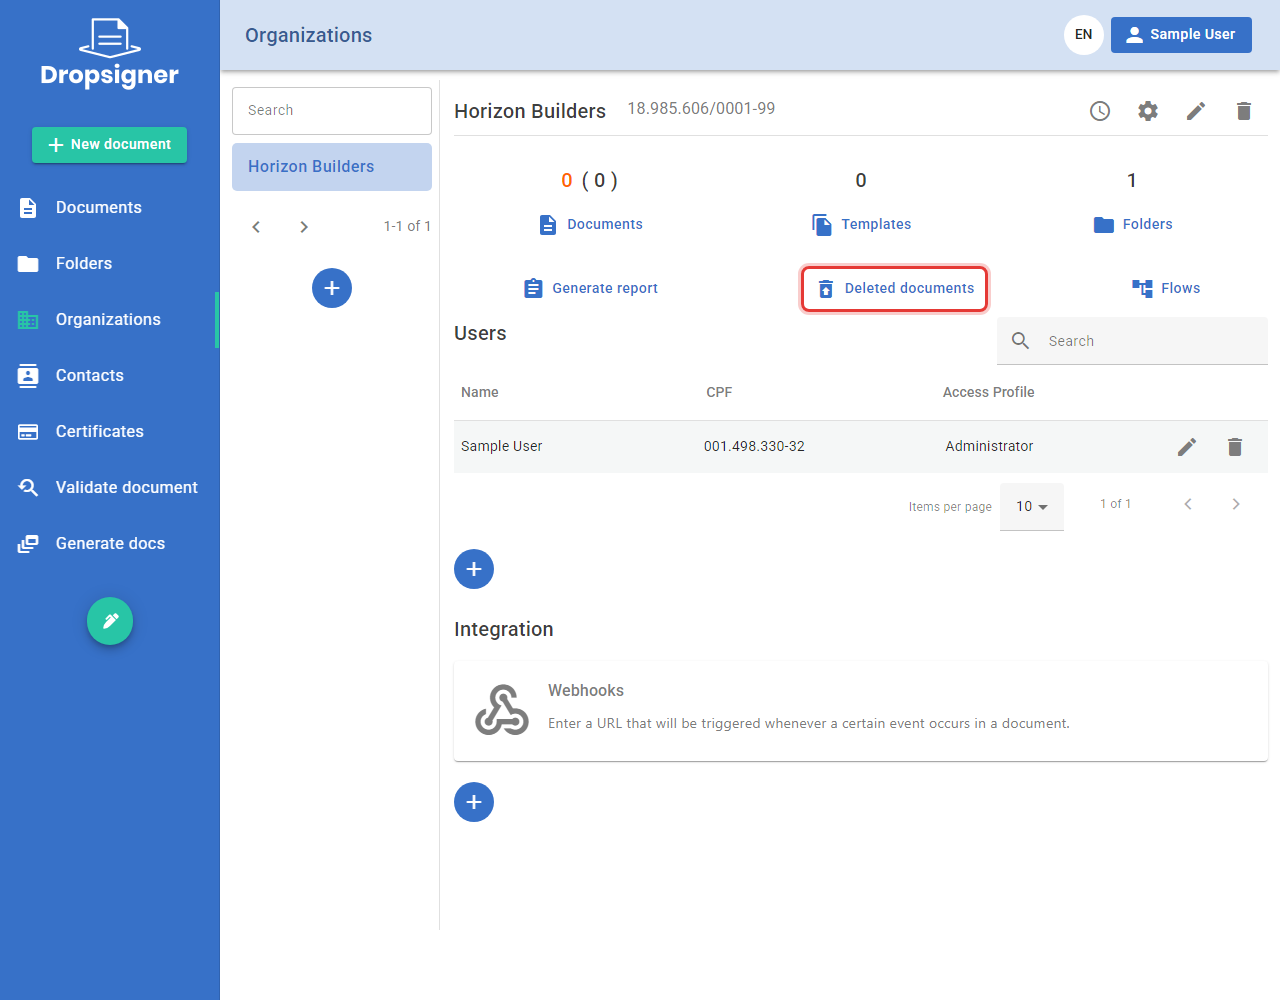
Click Deleted documents.
-
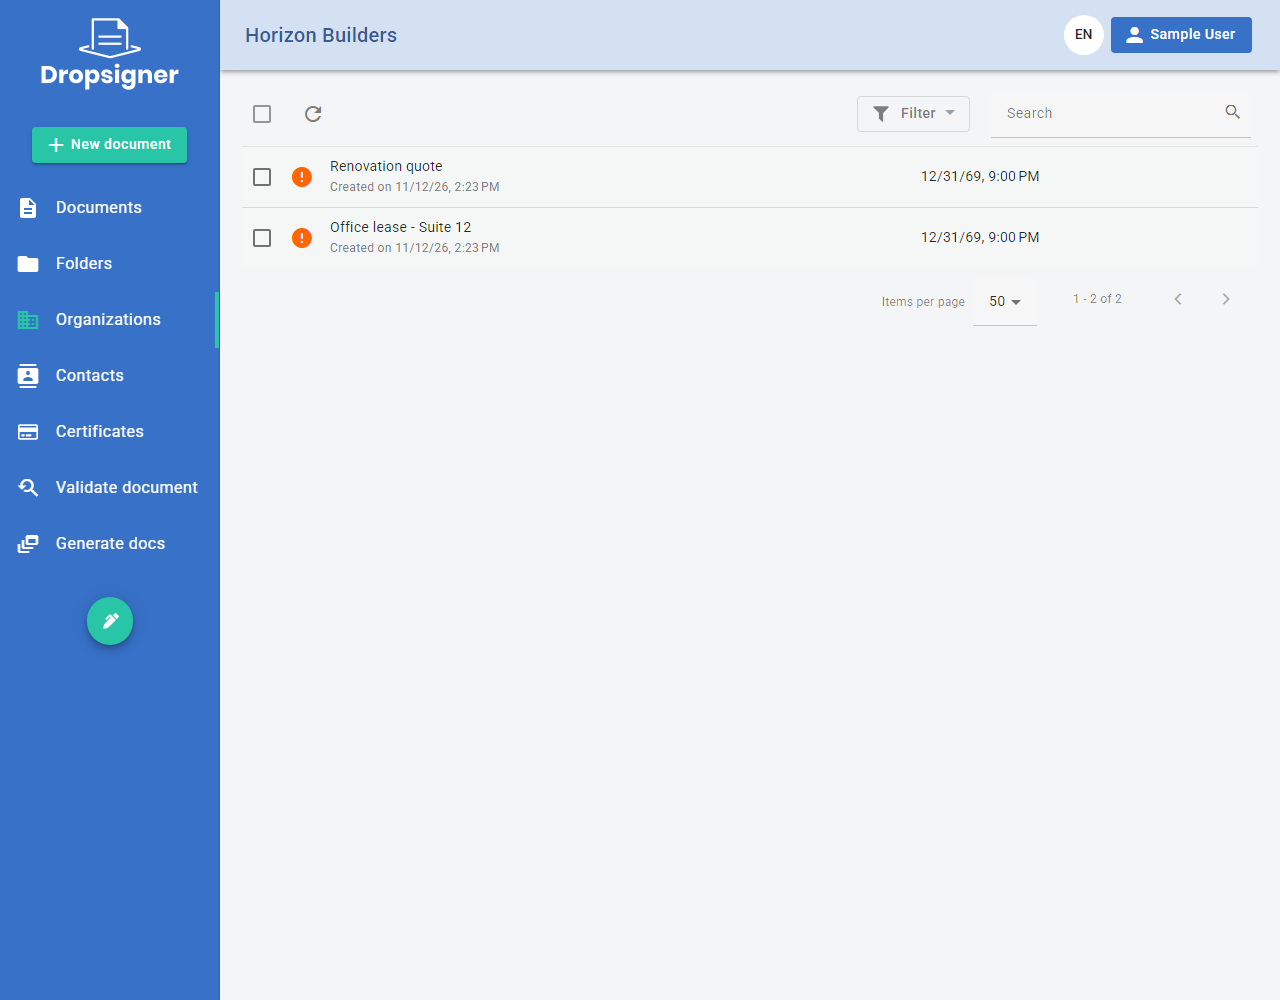
The list shows the organization's deleted documents.
-
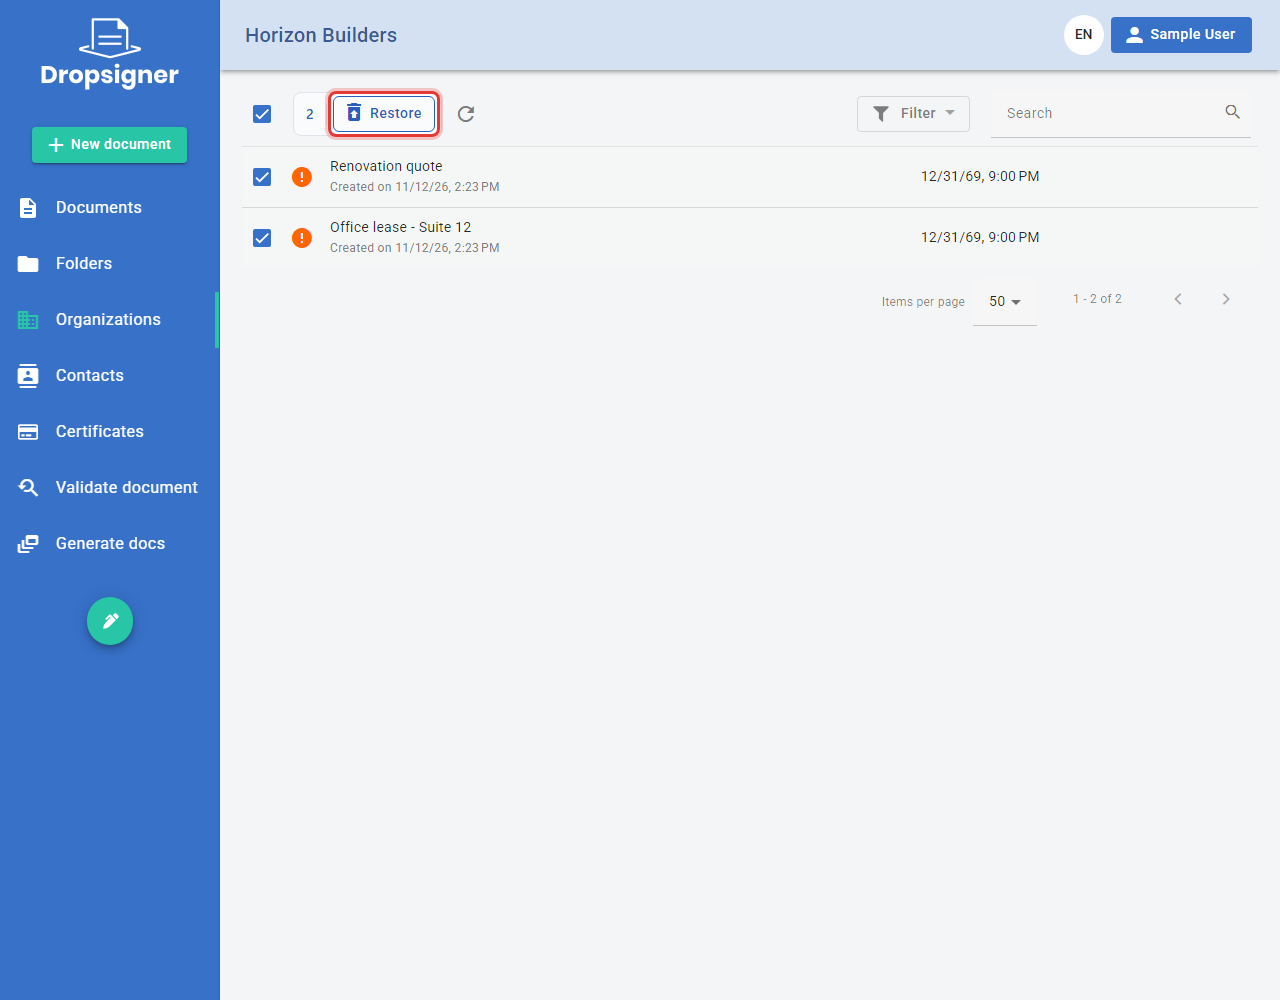
Check the documents you want to recover and click Restore.
-
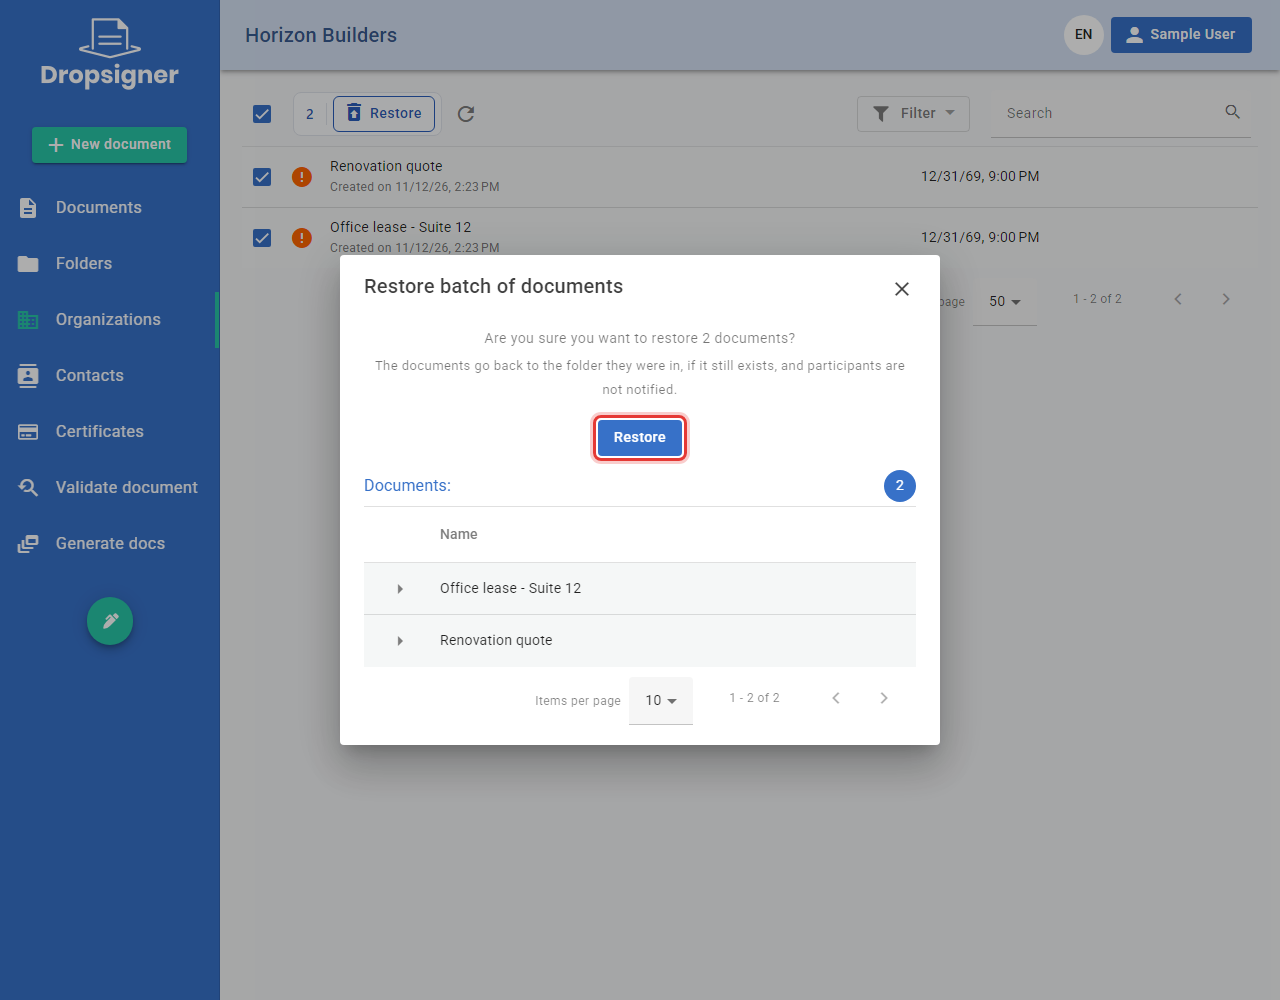
Check the number of documents and click Restore to confirm. Participants get no notice.
-
While the restore runs, you see its progress. You can close the window: it keeps running in the background. At the end, each document shows the folder it went back to. Click Conclude.
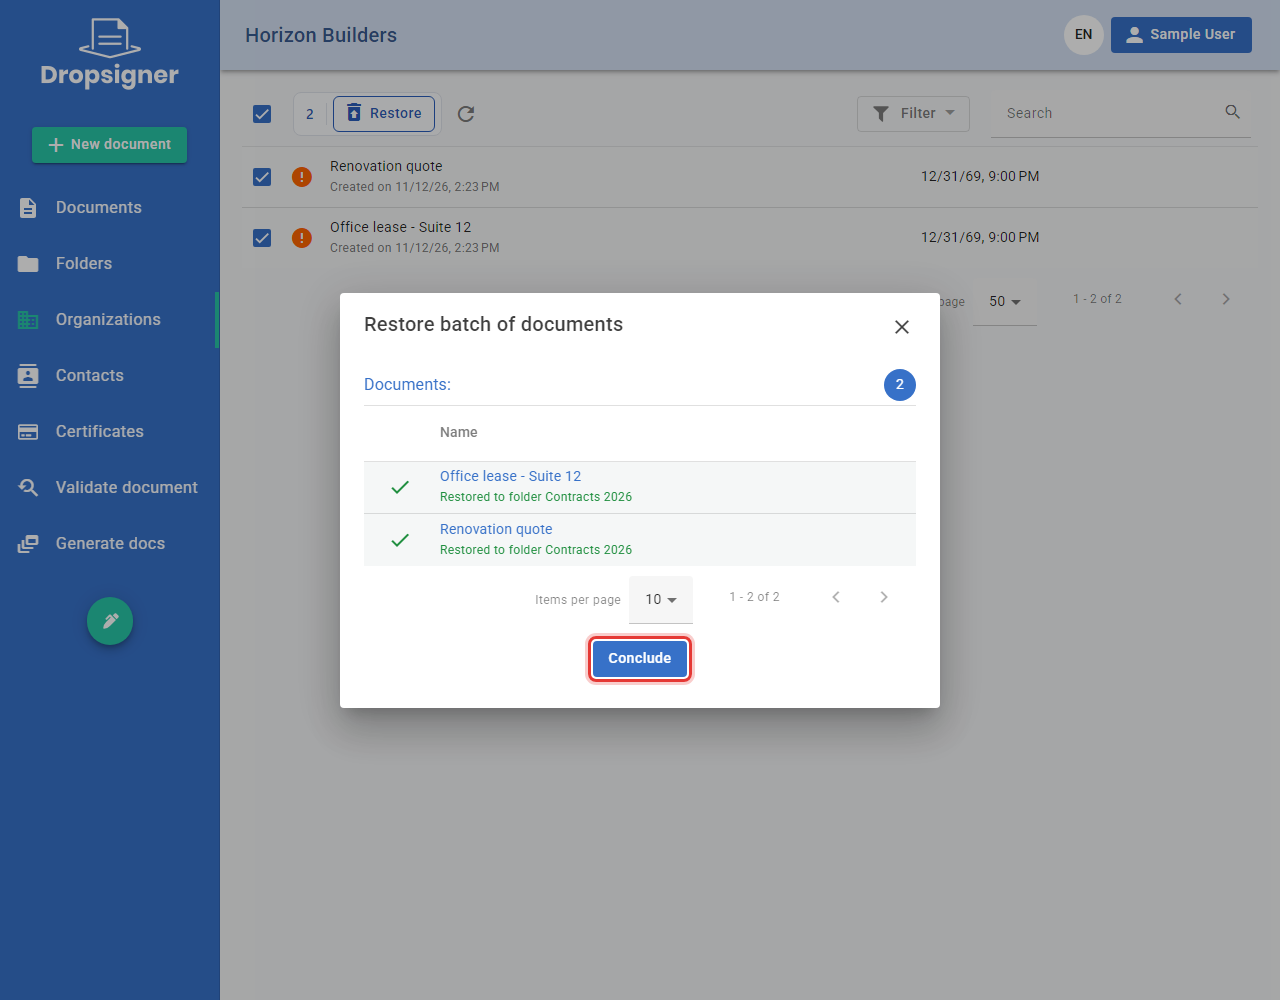
The document goes back to the folder it was in, as long as that folder still exists.
Learn more in Recovering deleted documents.
Hide the CPF in the signature mark
The organization now chooses whether the signer's CPF appears in the signature mark and in the printer-friendly version of its documents.
-
In the left menu, click Organizations, choose the organization and click the gear icon (settings).
-
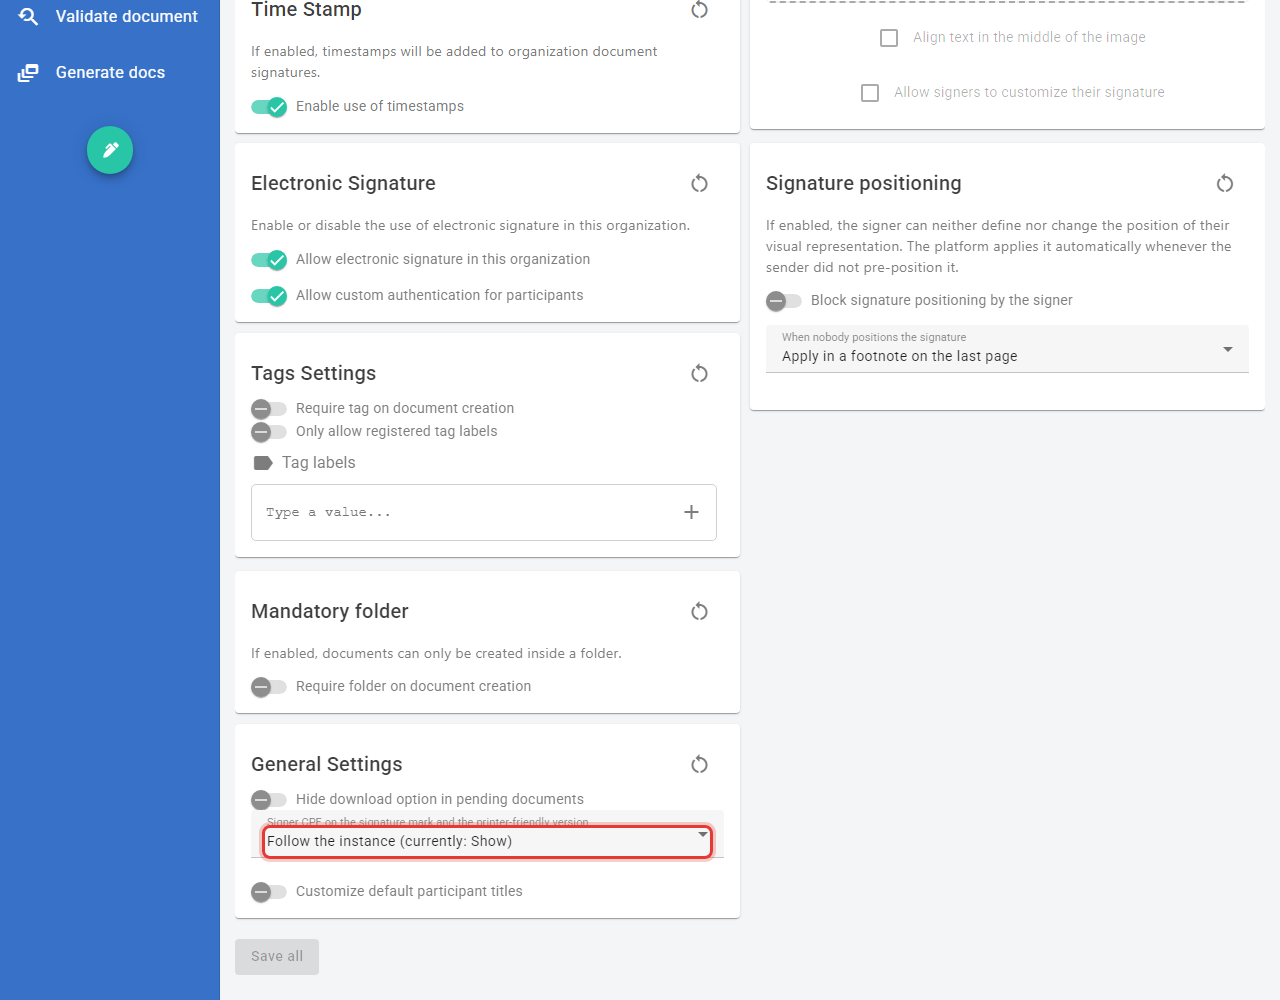
Under General Settings, click the Signer CPF on the signature mark and the printer-friendly version field.
-
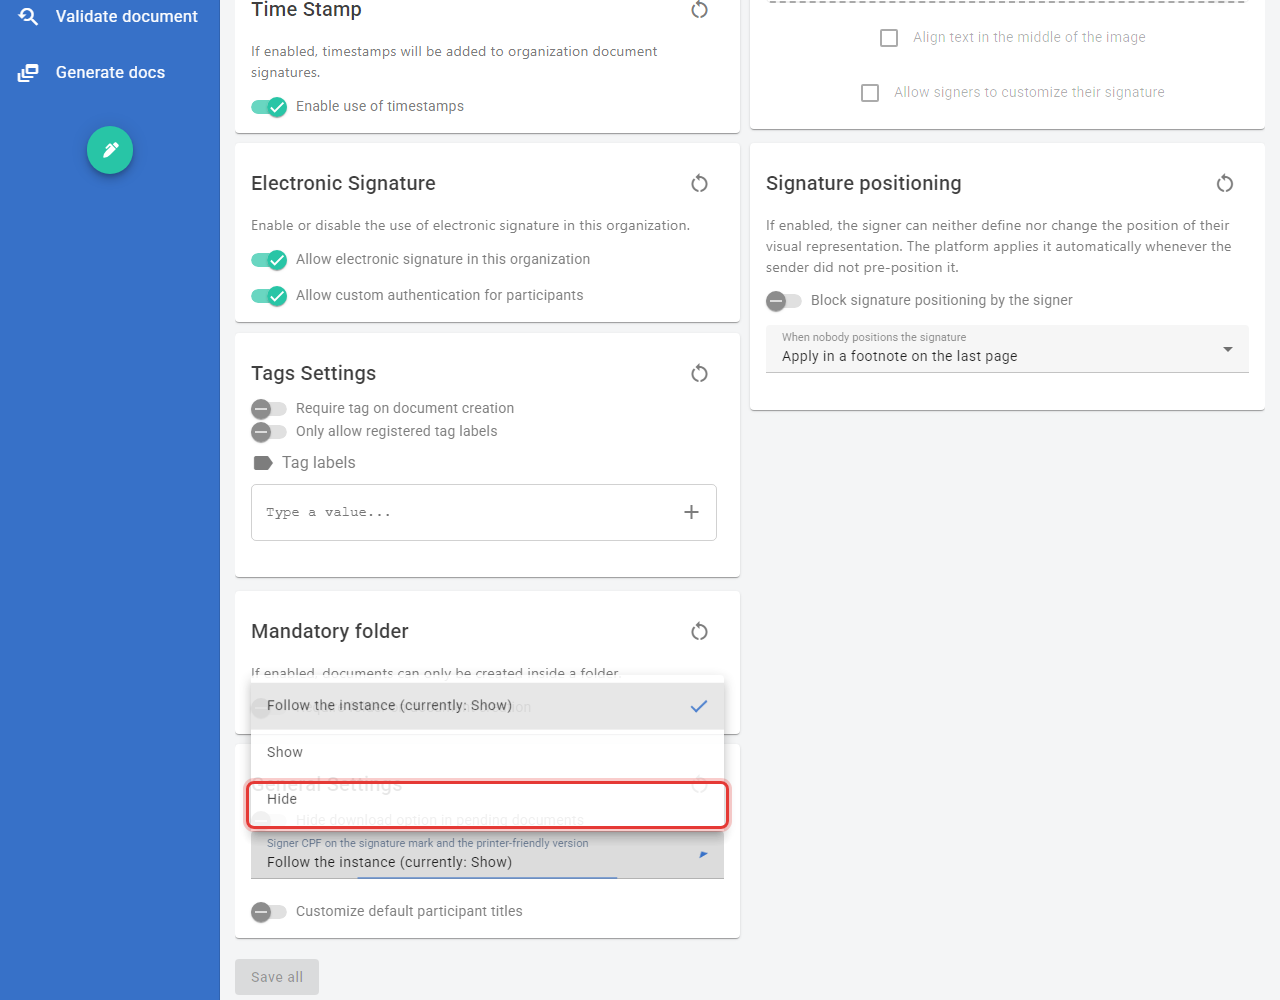
Pick an option:
- Follow the instance: uses the Signer default (the screen shows what the current default is);
- Show: the CPF appears;
- Hide: the CPF doesn't appear.
-
Click Save all, at the bottom of the page.
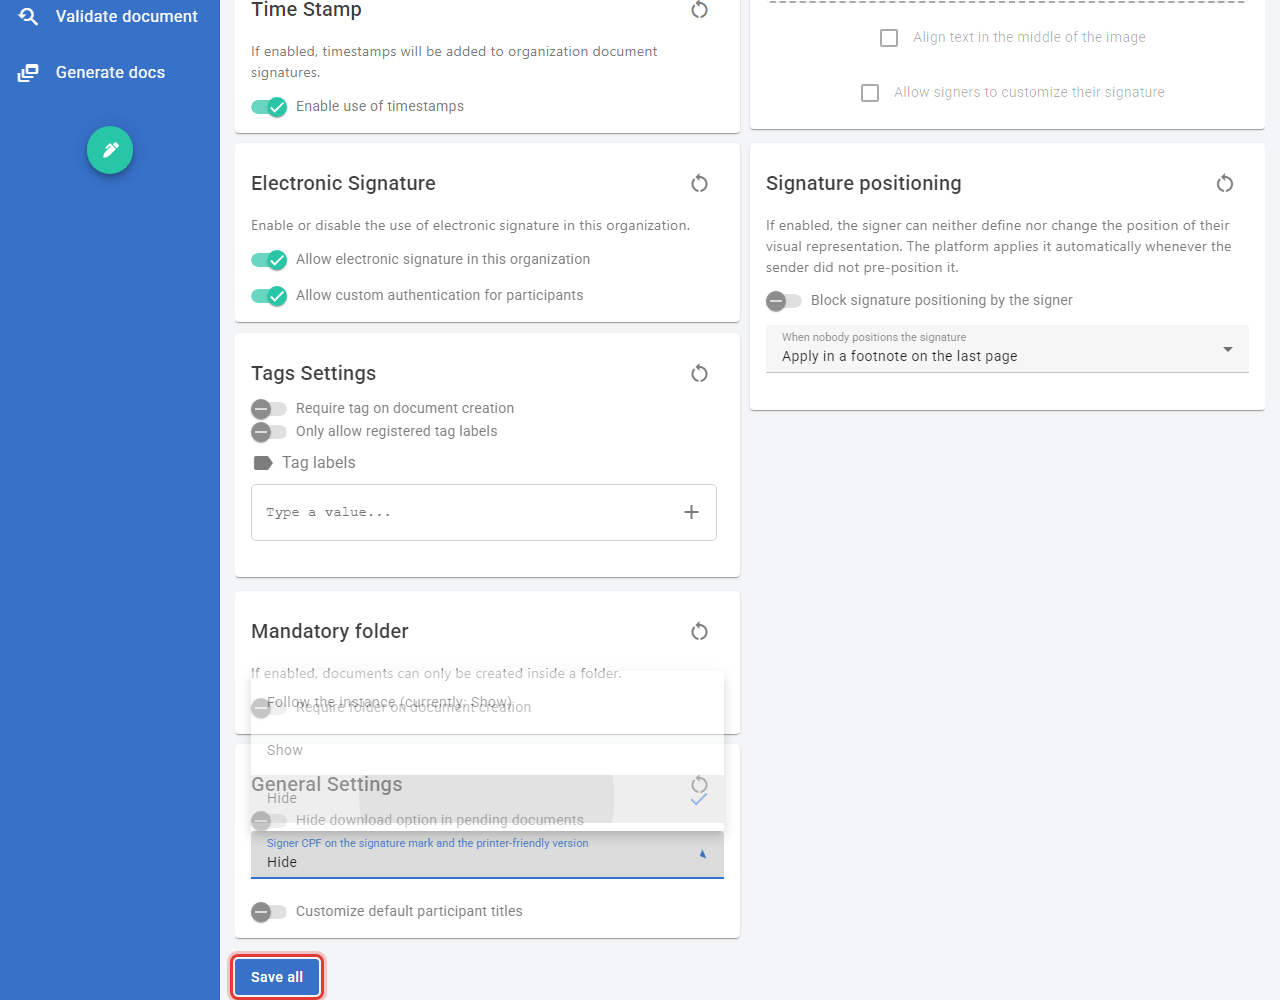
The choice applies to signatures made from then on. The signer's name keeps appearing as usual. Learn more in Privacy.
Restore canceled or expired documents
The Signer system administrator can put a canceled or expired document back in the status it had before, so the signing flow goes on.
-
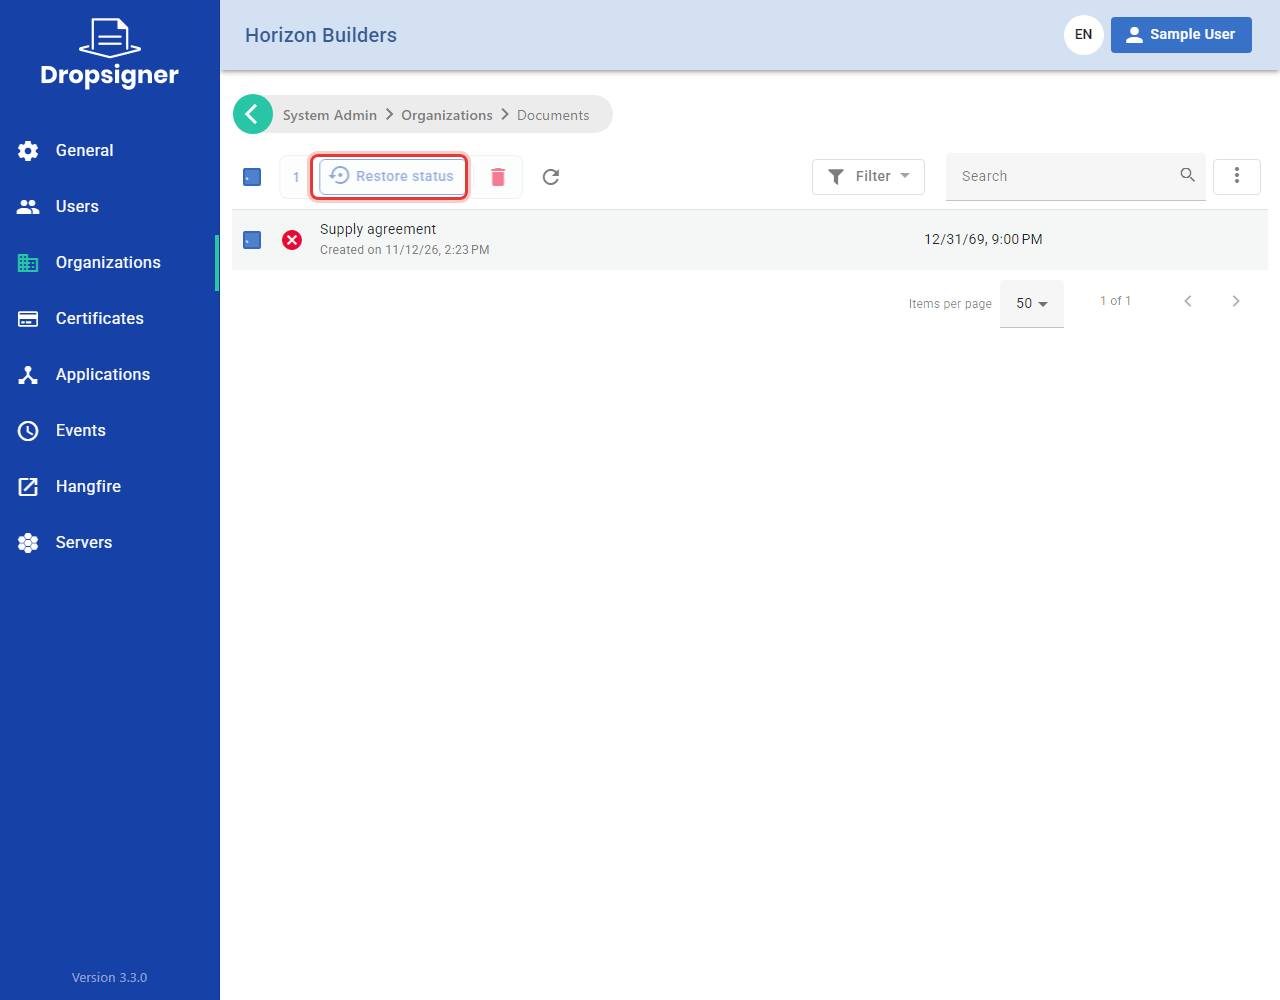
In System Admin, open Organizations, choose the organization and open its Documents list.
-
Check the canceled or expired documents and click Restore status.
-
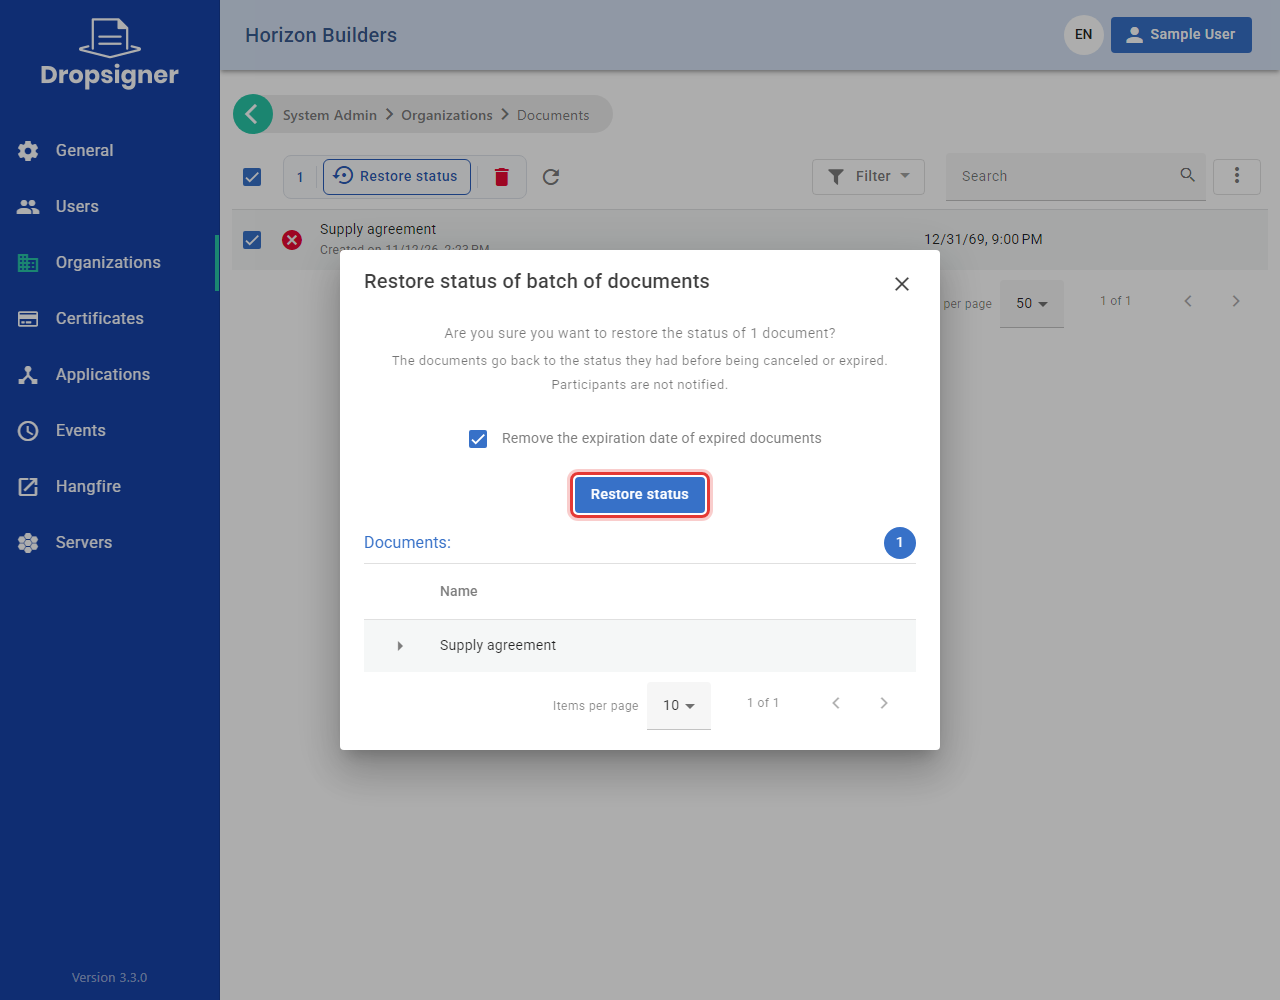
If there are expired documents, you can check Remove the expiration date of expired documents, so they don't expire again. Click Restore status to confirm. Participants get no notice.
In the same list, the system administrator also recovers deleted documents of any organization: click the more options button (⋮), choose Show deleted items and follow the steps of Recover deleted documents from step 4.
Learn more in Restoring canceled or expired documents.