Getting started with the Signer API
This guide takes you from zero to your first signed document using the Signer API. It has six steps and takes about 15 minutes. By the end you will have created a document through the API, collected a signature and downloaded the signed file.
The complete reference of every use case is in the Integration Guide.
Before you start
You will need:
- Access to a Signer instance, either the SaaS version at dropsigner.com or an on premises instance.
- An organization, since API keys always belong to one.
- Permission to create applications in that organization.
- Any PDF file to test with.
The examples in this guide use https://www.dropsigner.com as the base URL. If you run your own instance,
replace it with your instance URL, for example https://signer.yourcompany.com.
Step 1: Create the application and the API key
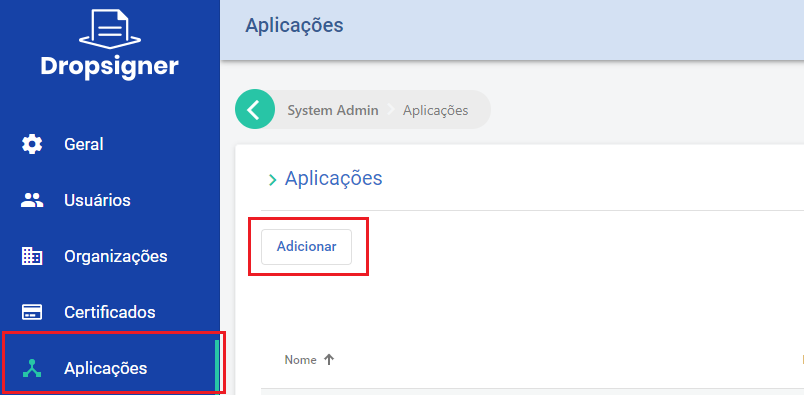
In the desired organization, go to Applications and create an application:
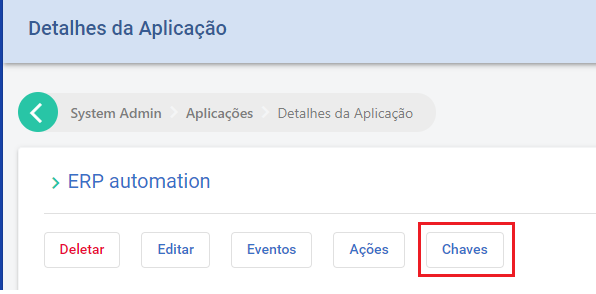
Then generate the key with the Keys button:
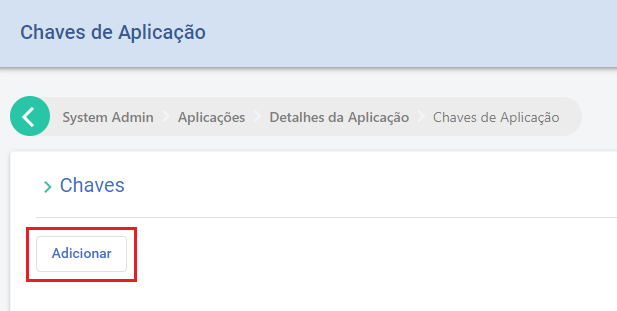
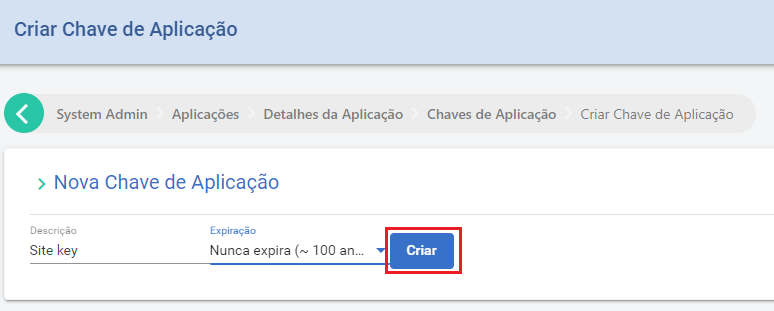
The key has the format application-name|<key> and must be sent in the X-Api-Key header of every
request:
X-Api-Key: your-application|xxxxxxxxxxxxxxxxxxxxxxxxxxxxxxxxxxxxxxxxxxxxxxxxxxxxxxxxxxxxxxxx
The key is shown only once, when it is created. Store it in a secret manager, because a lost key cannot be recovered, only replaced by a new one. The key scope is restricted to the organization it was created in: it can only see and create documents of that organization.
Check that the key works by listing the organization's documents:
curl -i "https://www.dropsigner.com/api/documents" -H "X-Api-Key: your-application|YOUR_KEY"
A 401 or 403 response means the key is invalid, revoked, or belongs to another organization.
Step 2: Upload the file
The file is uploaded before the document and gets an upload id, used in the next step. The simplest way is to send the bytes in Base64:
curl -X POST "https://www.dropsigner.com/api/uploads/bytes" -H "X-Api-Key: your-application|YOUR_KEY" -H "Content-Type: application/json" -d "{\"bytes\": \"$(base64 -w0 contract.pdf)\"}"
Response:
{
  "id": "3fa85f64-5717-4562-b3fc-2c963f66afa6",
  "size": 48213,
  "digest": "9bT1kQ2s3d4F5g6H7j8K9l=="
}
The id field is the upload id. digest is the MD5 of the received file and lets you check the
integrity of what reached the server.
For large files, prefer the multipart/form-data upload at POST /api/uploads, which avoids the overhead
of transporting the file in Base64.
Step 3: Create the document
Now create the document from the upload, defining the flow: who takes part and in which order.
curl -X POST "https://www.dropsigner.com/api/documents" \
  -H "X-Api-Key: your-application|YOUR_KEY" \
  -H "Content-Type: application/json" \
  --data-binary @document.json
Contents of document.json:
{
  "files": [
    {
      "id": "3fa85f64-5717-4562-b3fc-2c963f66afa6",
      "displayName": "Services agreement",
      "name": "contract.pdf",
      "contentType": "application/pdf"
    }
  ],
  "flowActions": [
    {
      "type": "Signer",
      "step": 1,
      "user": {
        "name": "John Wick",
        "identifier": "81976153069",
        "email": "john.wick@mailinator.com"
      },
      "allowElectronicSignature": true
    }
  ]
}
The response has one item per uploaded file, linking the upload to the created document:
[
  {
    "uploadId": "3fa85f64-5717-4562-b3fc-2c963f66afa6",
    "documentId": "b12cb1b2-5d6e-40b2-a050-097d068c4c11"
  }
]
The main fields:
| Field | What it does |
|---|---|
files[].id | The id returned by the upload in the previous step |
files[].displayName | The document name as shown in Signer |
files[].name / files[].contentType | Name and mime type of the original file |
flowActions[].type | Signer, Approver, SignRule or ApproverRule |
flowActions[].step | Position in the flow. Participants in the same step act in parallel, and a higher step is only notified when the previous one finishes |
flowActions[].user | The participant (name, identifier, email) |
flowActions[].allowElectronicSignature | Allows electronic signature, without a digital certificate |
You can send several files in the same call. Each one becomes a document, all with the same flow. To group
several PDFs into a single document, use isEnvelope: true together with envelopeName.
As soon as the document is created, Signer automatically emails the participants of the first step. To
notify no one at that moment, as happens when signing takes place inside your own application, send
disablePendingActionNotifications: true.
Step 4: Sign the document
Through the notification (default). The participant receives an email with a link that opens the signature screen. No account and no authentication is required to sign.
Inside your application. Request the action URL of that participant and redirect (or embed) the user:
curl -X POST "https://www.dropsigner.com/api/documents/b12cb1b2-5d6e-40b2-a050-097d068c4c11/action-url" \
  -H "X-Api-Key: your-application|YOUR_KEY" \
  -H "Content-Type: application/json" \
  -d "{\"identifier\": \"81976153069\", \"emailAddress\": \"john.wick@mailinator.com\"}"
For this case, combine it with disablePendingActionNotifications: true on creation. The
Embedded Signature page shows how to embed the signature screen in your own page.
Step 5: Track the status
curl "https://www.dropsigner.com/api/documents/b12cb1b2-5d6e-40b2-a050-097d068c4c11" -H "X-Api-Key: your-application|YOUR_KEY"
{
  "id": "b12cb1b2-5d6e-40b2-a050-097d068c4c11",
  "name": "Services agreement",
  "status": "Concluded",
  "flowActions": [
    {
      "id": "4bf61c68-eaf1-455f-b4a1-6141554f1dae",
      "type": "Signer",
      "status": "Completed",
      "step": 1,
      "user": { "name": "John Wick", "identifier": "81976153069" }
    }
  ]
}
- The document is finished when
statusisConcluded. - A participant has completed their action when the
statusof theirflowActionisCompleted.
Do not poll this endpoint to find out when the document is ready. In production, register a Webhook and let Signer notify your application.
Step 6: Download the signed document
curl -L "https://www.dropsigner.com/api/documents/b12cb1b2-5d6e-40b2-a050-097d068c4c11/content?type=Signatures" -H "X-Api-Key: your-application|YOUR_KEY" -o signed-contract.pdf
The type parameter selects which version to download:
type | What you get |
|---|---|
Signatures | The signed file, that is, the PDF with the embedded signatures (or a .p7s, when the signature is CAdES) |
Original | The original file, as uploaded |
OriginalWithMarks | The original with the signature marks stamped on it |
PrinterFriendlyVersion | Printer friendly version, in PDF, with the signatures manifest |
SignaturesManifest | The signatures manifest only, in PDF |
SignatureMarks | PDF with the signature visual representations |
SigningTags | PDF with the signing tags |
Canceled, expired or refused documents can only be downloaded as Original and
PrinterFriendlyVersion; the other types return an error. Downloading refused documents can be enabled by
instance configuration.
If you need the bytes in JSON instead of a download, use GET /api/documents/{id}/content-b64, which
returns name, contentType and the bytes in Base64.
Done, what next?
- Integration Guide covers every use case: reminders, cancellation, refusal, new version, signature validation, listings and signature pre-positioning.
- Webhooks shows how to receive document events instead of checking the status.
- Embedded Signature brings the signature screen into your application.
- Administration APIs let you create and manage users and organizations.
- Full samples in C#, Java, PHP and Node.js are at SignerSamples.